Networking
Networking refers to exposing your application to the internet, to be accessible from the public network.
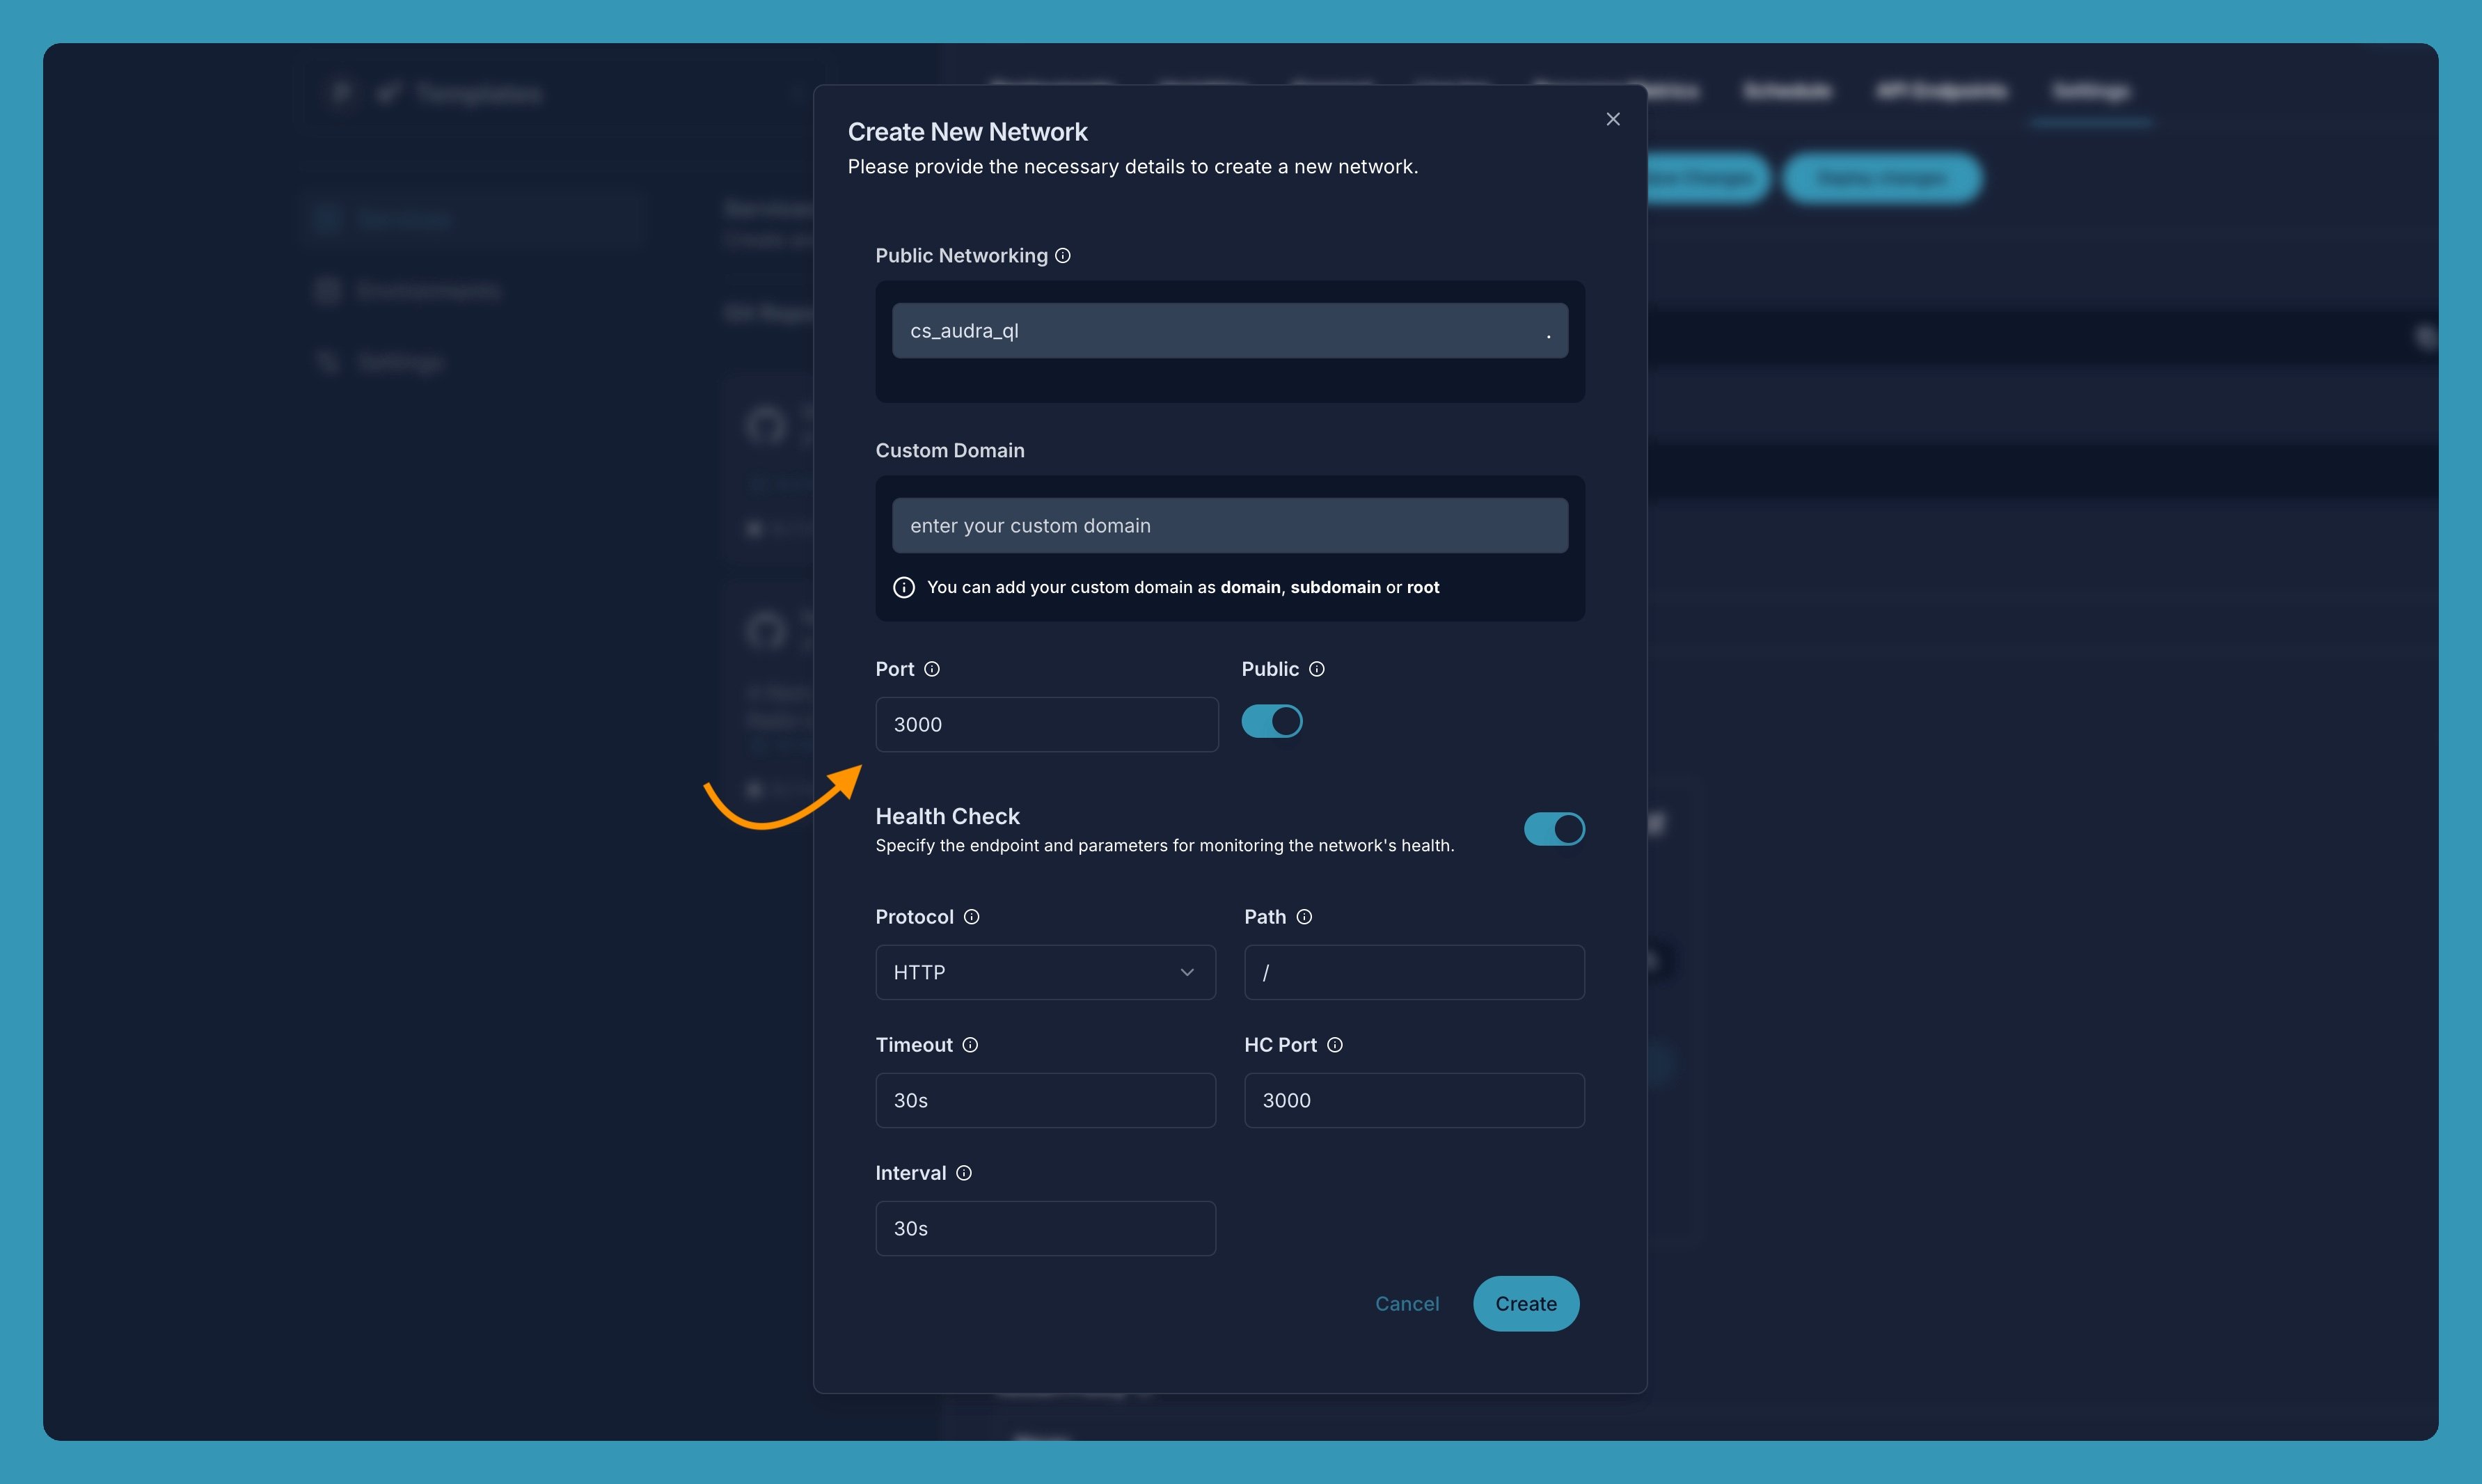
Assign a Port
To assign a domain to your service, go to your service's settings, find the Deploy Settings -> Networks section, and click on Add New Network button if you don't have any port assigned yet otherwise click on Edit icon button.
Then define the port you want to expose your service on.
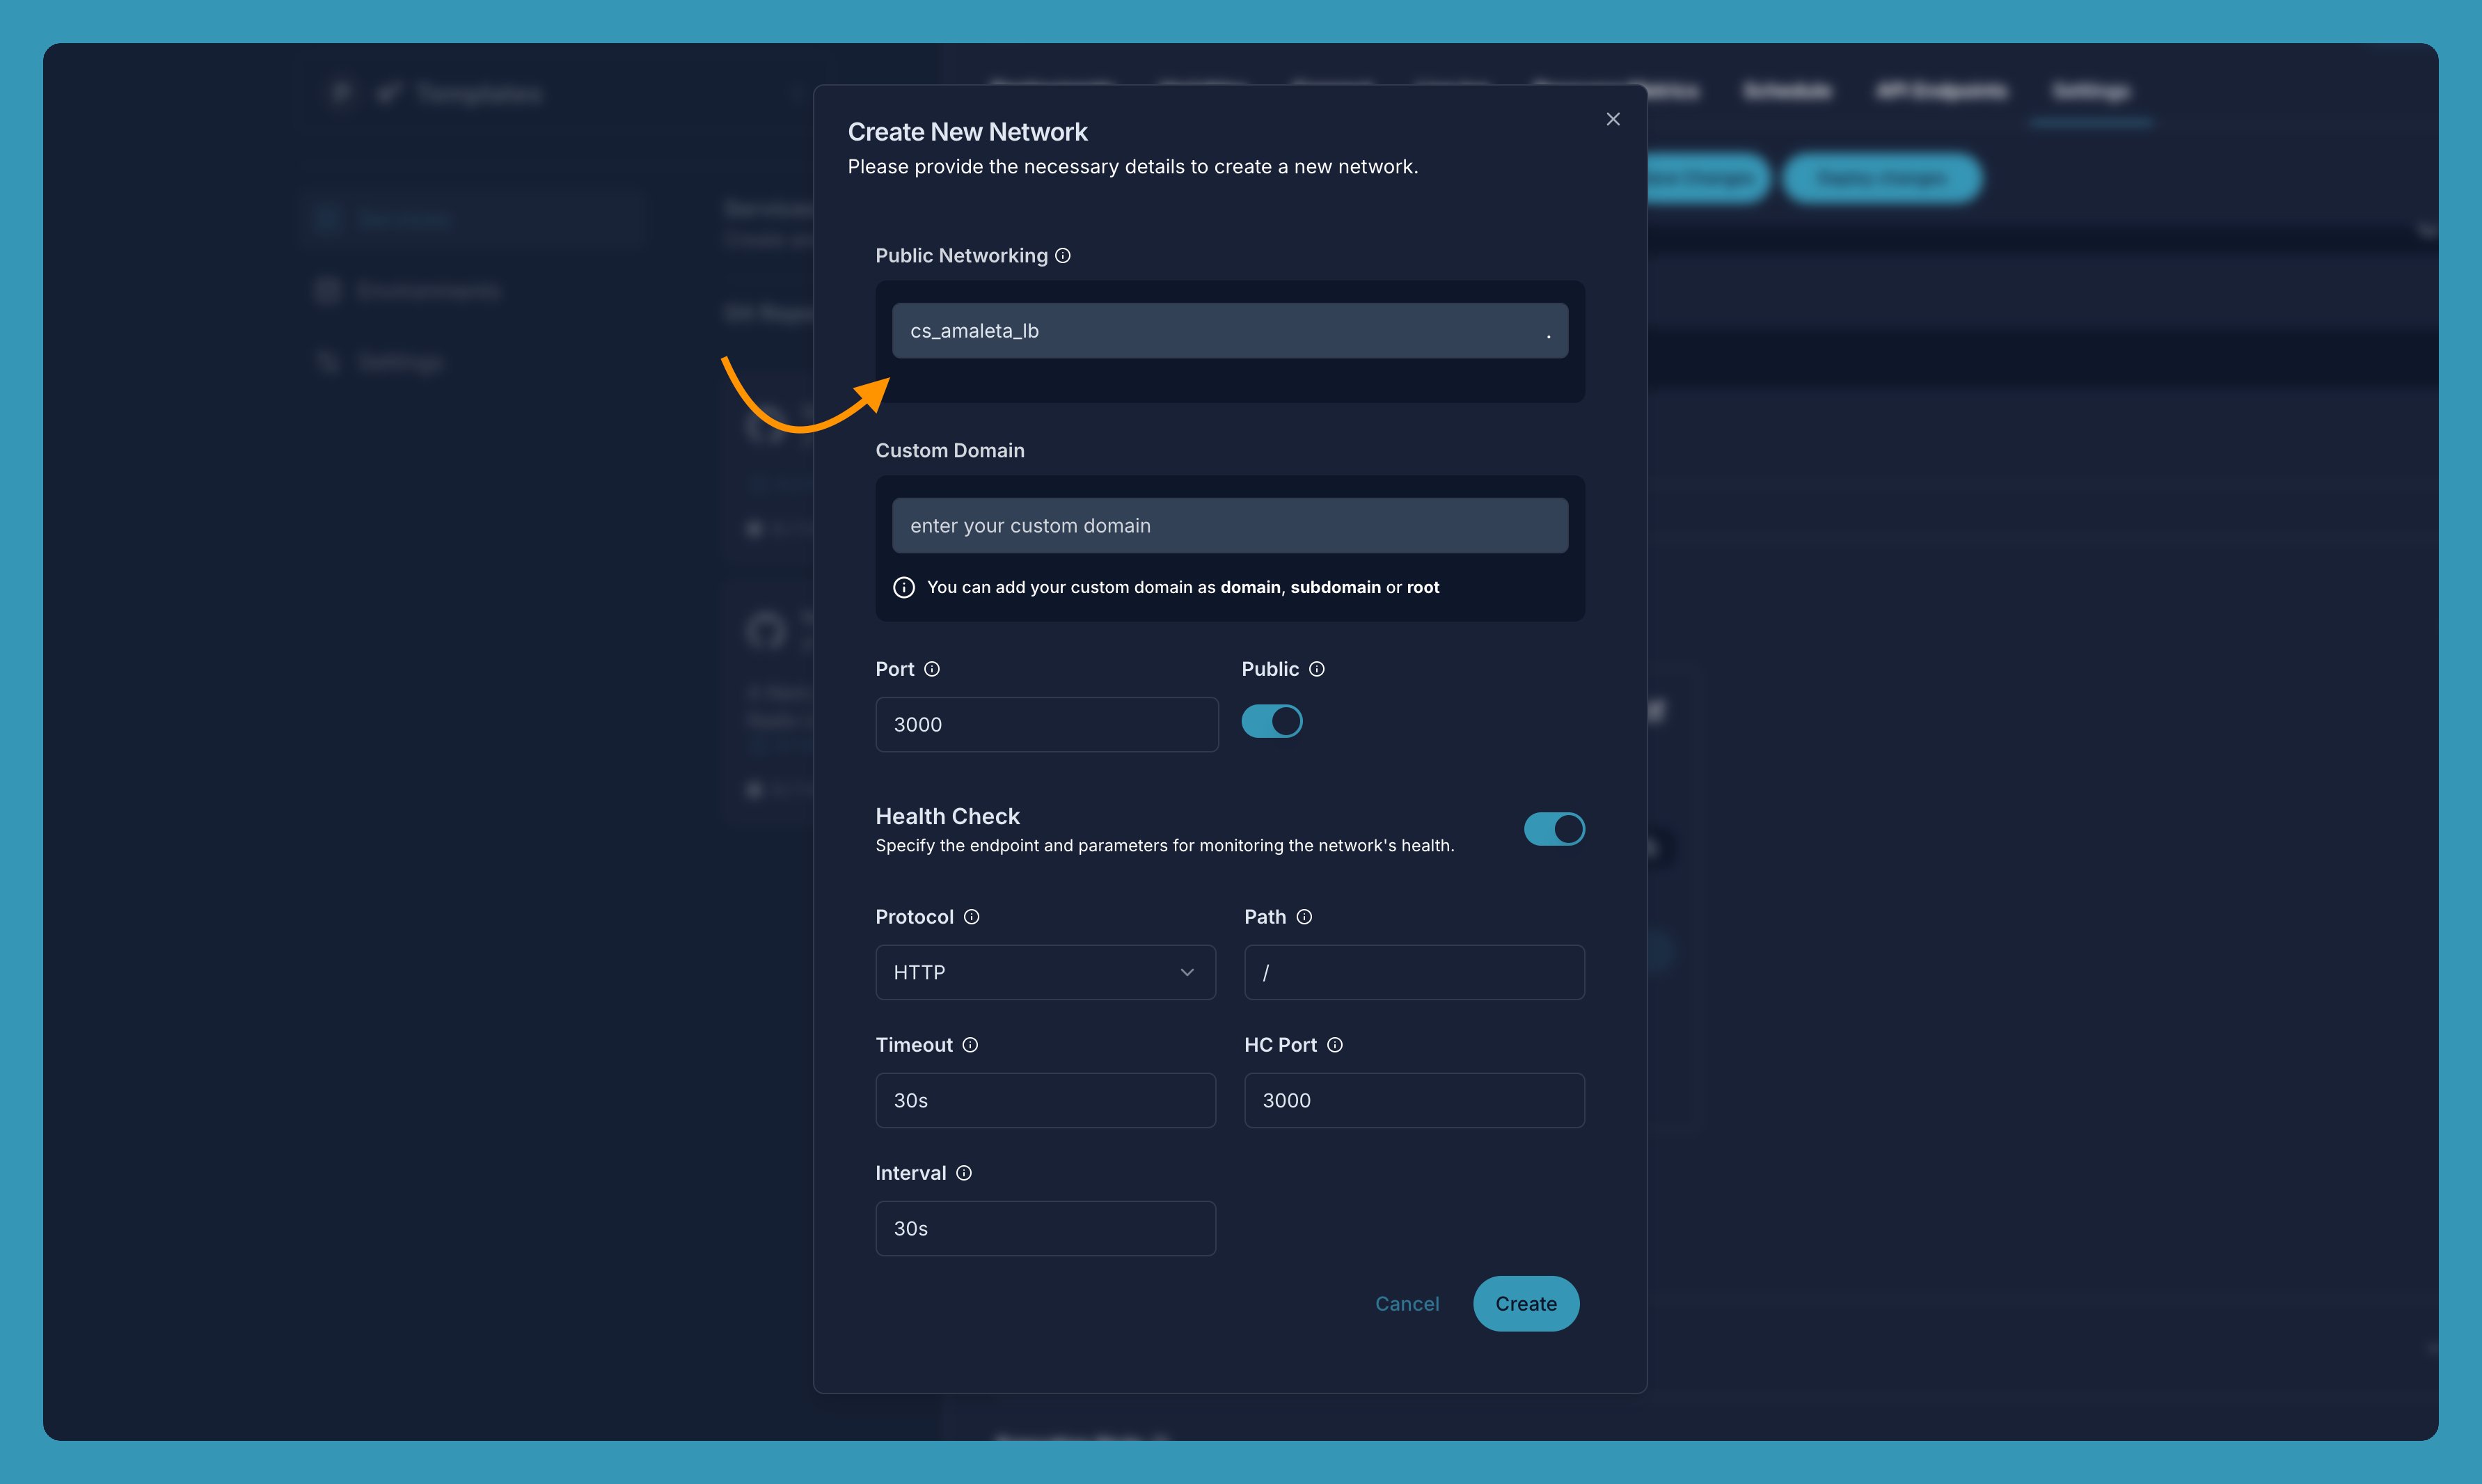
Assign a Domain
CloudStation services don't obtain a domain automatically, but it is easy to set one up.
To assign a domain to your service, go to your service's settings, find the Deploy Settings -> Networks section, and click on Add New Network button if you don't have any port assigned yet otherwise click on Edit icon button.
Then define the domain you want to expose your service on.
Note: Make sure the Public is enabled.
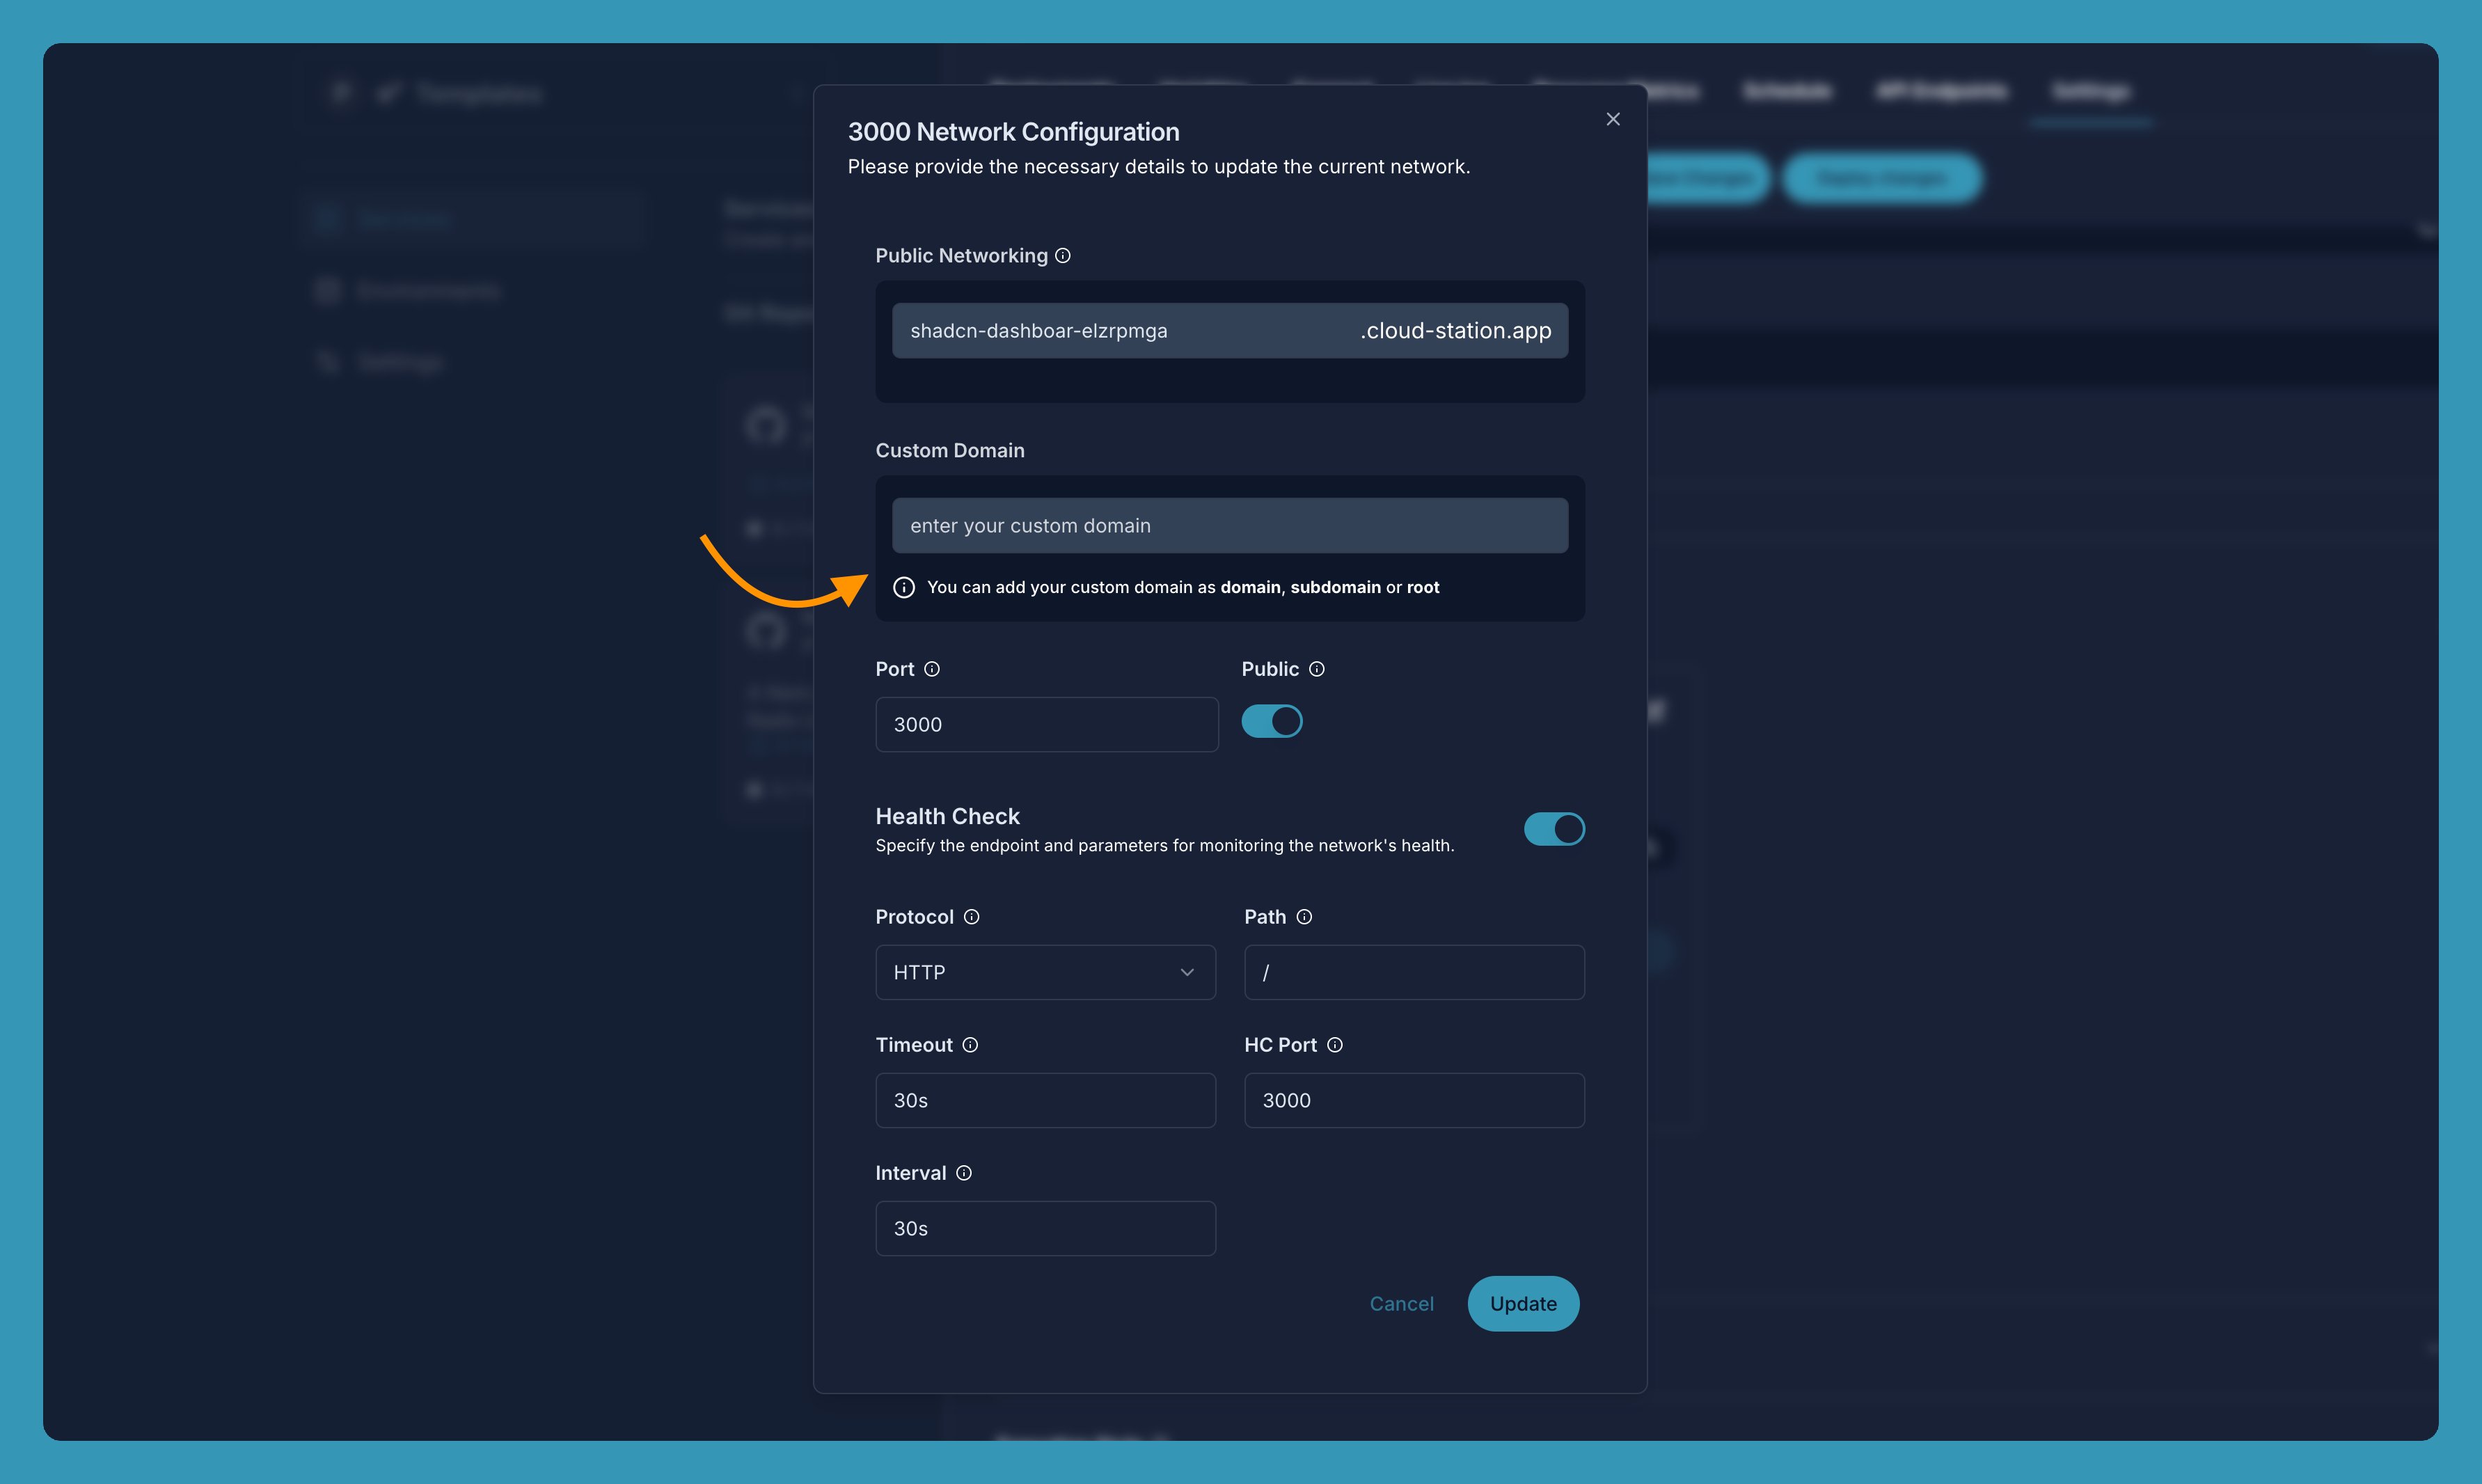
Custom Domain
to assign a custom domain to your service, go to your service's settings, find the Deploy Settings -> Networks section, and click on Add New Network button if you don't have any port assigned yet otherwise click on Edit icon button.
Then define the Custom Domain you want to expose your service on.
Note: Make sure the Public is enabled.
Important Considerations
- Freenom domains are not allowed and not supported.
- It is therefore not possible to use both
yourdomain.comandwww.yourdomain.comas these are considered two distinct custom domains. - Invalid domain format will be rejected. Ensure your domain:
- Uses the format:
example.com,www.example.com, orsubdomain.example.com - Does not include HTTPS protocols
- Does not include slashes or colons
- Does not end with a dash
- Does not include any leading or trailing whitespace
- Uses the format:
When adding a root or apex domain to your CloudStation service, you must ensure that you add the appropriate DNS record to the domain within your DNS provider. At this time, CloudStation supports CNAME Flattening and dynamic ALIAS records.
Additional context
Generally, direct CNAME records at the root or apex level are incompatible with DNS standards (which assert that you should use an "A" or "AAAA" record). However, given the dynamic nature of the modern web and PaaS providers like CloudStation, some DNS providers have incorporated workarounds enabling CNAME-like records to be associated with root domains. Check out RFC 1912 if you're interested in digging into this topic.
Choosing the correct record type
The type of record to create is entirely dependent on your DNS provider. Here are some examples -
- Cloudflare CNAME - Simply set up a CNAME record for your root domain in Cloudflare, and they take care of the rest under the hood. Refer to this guide for more detailed instructions.
- DNSimple ALIAS - Set up an dynamic ALIAS in DNSimple for your root domain.
- Namecheap CNAME - Set up an CNAME in Namecheap for your root domain.
- bunny.net - Set up a ANAME in bunny.net for your root domain.
In contrast there are many nameservers that don't support CNAME flattening or dynamic ALIAS records -
Workaround - Changing your Domain's Nameservers
If your DNS provider doesn't support CNAME Flattening or dynamic ALIAS records at the root, you can also change your domain's nameservers to point to Cloudflare's nameservers. This will allow you to use a CNAME record for the root domain. Follow the instructions listed on Cloudflare's documentation to change your nameservers.
Adding a Root Domain With www Subdomain to Cloudflare
If you want to add your root domain (e.g., mydomain.com) and the www. subdomain to Cloudflare and redirect all www. traffic to the root domain:
- Create a Custom Domain in CloudStation for your root domain (e.g.,
mydomain.com). Copy thevaluefield. This will be in the form:abc123.up.CloudStation.app. - Add a
CNAMEDNS record to Cloudflare:Name→@.Target→ thevaluefield from CloudStation.Proxy status→on, should display an orange cloud.- Note: Due to domain flattening,
Namewill automatically update to your root domain (e.g.,mydomain.com).
- Add another
CNAMEDNS record to Cloudflare:Name→www.Target→@Proxy status:→ on, should display an orange cloud.- Note: Cloudflare will automatically change the
Targetvalue to your root domain.
- Enable Full SSL/TLS encryption in Cloudflare:
- Go to your domain on Cloudflare.
- Navigate to
SSL/TLS -> Overview. - Select
Full, orFull (strict).
- Enable Universal SSL in Cloudflare:
- Go to your domain on Cloudflare.
- Navigate to
SSL/TLS -> Edge Certificates. - Enable
Universal SSL.
- After doing this, you should see
Cloudflare proxy detectedon your Custom Domain in CloudStation with a green cloud. - Create a Bulk Redirect in Cloudflare:
- Go to your Cloudflare dashboard.
- Navigate to
Bulk Redirects. - Click
Create Bulk Redirect List. - Give it a name, e.g.,
www-redirect. - Click
Or, manually add URL redirects. - Add a
Source URL:https://www.mydomain.com. - Add
Target URL:https://mydomain.comwith status301. - Tick all the parameter options: (
Preserve query string,Include subdomains,Subpath matching,Preserve path suffix) - Click
Next, thenSave and Deploy.
Note: DNS changes may take some time to propagate. You may want to refresh your DNS cache by using commands like ipconfig /flushdns on Windows or dscacheutil -flushcache on macOS. Testing the URLs in an incognito window can also help verify changes.
Edit this file on GitHub