Deploy Git Repository in CloudStation
After selecting a Git repository in CloudStation, you will see the Deploy Git Repo option. Follow the steps below to deploy your repository effectively.
Quick Deploy
If you want to proceed with the default configuration:
- Simply click Deploy.
- CloudStation will handle the deployment automatically using the default settings.
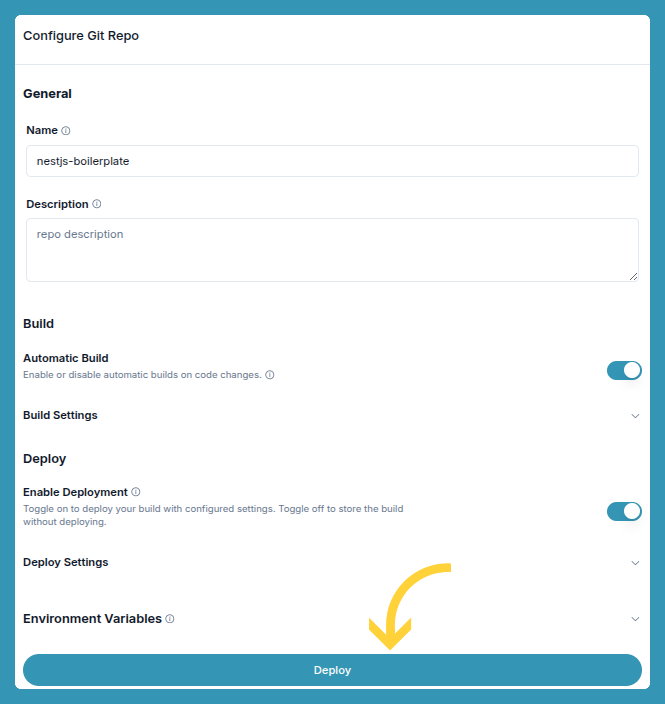
Configure Git Repository
For users who wish to customize the deployment, the configuration is divided into several main sections. Each field has a dedicated page for more information (links provided).
1. General
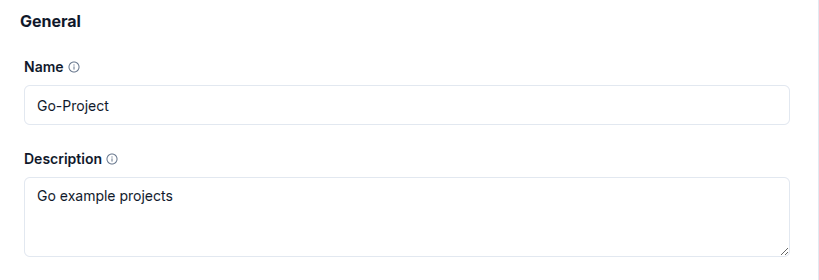
- Title and Description: This section allows you to personalize the title and description of your repository in CloudStation. Customizing these fields can help you easily identify and manage your projects, especially in environments with multiple repositories.
- Learn more about General Settings.
2. Build
The build section provides extensive options for controlling how your repository is built and deployed. Below are the key fields:
- Enable or Disable Automatic Builds: This toggle allows you to decide whether builds should automatically trigger on code changes. When enabled, deployments will occur every time changes are pushed to the selected branch.

-
Build Settings:
- Git Branch: Specify the branch that will trigger builds and deployments. Changes made to this branch will automatically update the deployment environment.

-
More about Git Branch Settings.
-
Build Context: Define the directory in your repository that will be used for the build and deployment steps. For example, if your project files are located in a subfolder, specify that folder here.

-
More about Build Context.
-
Build Command: Override the default build command executed during the build process. This is useful if your project requires specific build steps, such as running a custom script or tool.

-
Learn about Build Command.
-
Start Command: Set the command to run when deploying your app. This command will be executed to start the application after a successful build. You can use this to define entry points or initialize services.

-
Read about Start Command.
-
Builder: Choose a builder for your project, such as Node.js, Python, or custom build environments. This option ensures compatibility with your application’s stack and optimizes the build process.

-
Details on Builder Options.
-
Push to Registry: Enable this option to push builds to a specified container registry. If disabled, CloudStation uses its default registry at no extra cost. This is particularly useful for organizations requiring private registries.

- More on Push to Registry.
3. Deploy
The deploy section contains settings that define how your build is deployed and managed:
- Enable Deployment: Toggle on to deploy your build with the configured settings. Toggle off to store the build without deploying.

-
Cloud Provider: Select the cloud service provider where the deployment will be hosted, such as AWS, GCP, or Azure.
-
Cloud Region: Specify the location for your deployment. Choosing a region closer to your users can reduce latency.
-
Restart Attempts: Set the number of times CloudStation should attempt to restart the service if it stops unexpectedly due to an error.

- Replica: Define the number of instances that will be run for each deployment of this service. This is useful for scaling and redundancy.

- Learn more about Deploy Settings.
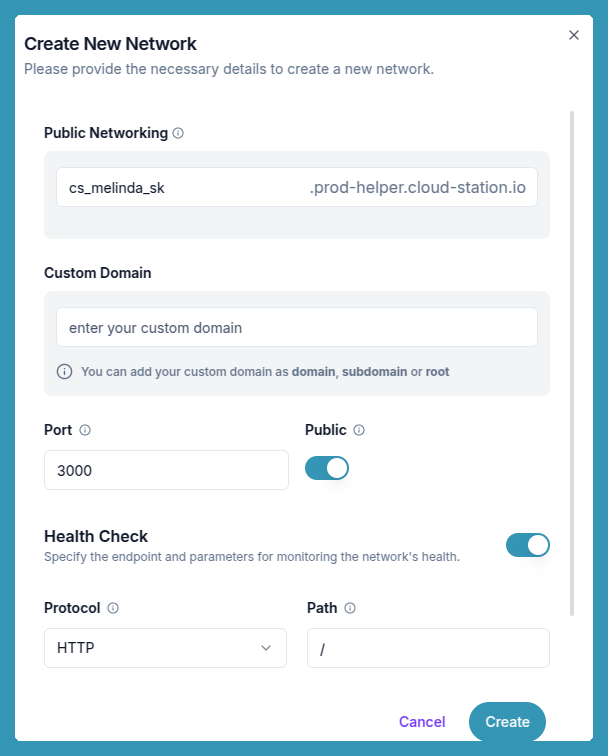
4. Network Configuration
For users needing custom networking settings, this section allows you to define the following:
- Public Networking: Toggle this setting to enable or disable public access to your deployment.
- Custom Domain: Link a custom domain to your service for easier access.
- Port: Specify the port on which your application will be exposed.
- Public: Determine whether the service should be accessible publicly or privately.
- Health Check: Set up an endpoint and parameters to monitor the health of your network and ensure uptime.
- Protocol: Specify the communication protocol (e.g., tcP or HTTPS).
- Path: Define the endpoint path for the health check.
- Timeout: Set the time limit for health check responses.
- HC Port: Specify the port used for health checks.
- Interval: Define how frequently health checks should occur.
Learn more about Network Configuration.
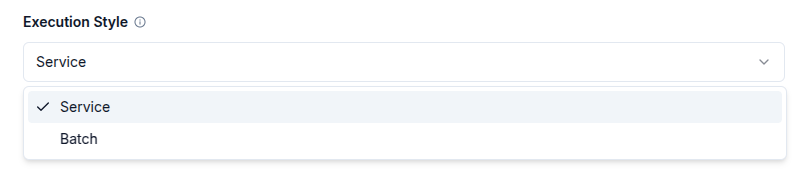
5. Execution Style and Resources
Control how your application runs and allocate resources:
- Execution Style: Select the execution mode that best fits your deployment requirements.
-
Resource Settings:
- GPU: Specify the amount of GPU capacity for your deployment.
- RAM (in GB): Allocate the desired amount of RAM in gigabytes.

- CPU (in GHz): Define the CPU capacity in gigahertz for optimal performance.

Learn more about Resource Allocation.
6. Environment Variables
This section allows you to manage configuration variables for your deployment:
- Variables: Add custom variables specific to your application.
- Shared Variables: Manage variables that are shared across multiple deployments.
- Service Discovery: Define variables to connect and communicate between services. Fields include:
- From Service: Specify the service name.
- Service Port: Indicate the port used for communication.
- Key: Provide a unique identifier for the variable.
- Value: Assign a value to the variable.

Learn more about Environment Variables.
Edit this file on GitHub