

Using an Agent
The agent detail page, and how Start Session turns a profile into a working agent
Click View on any catalog card to open the agent's detail page — everything you need to judge an agent before putting it to work.
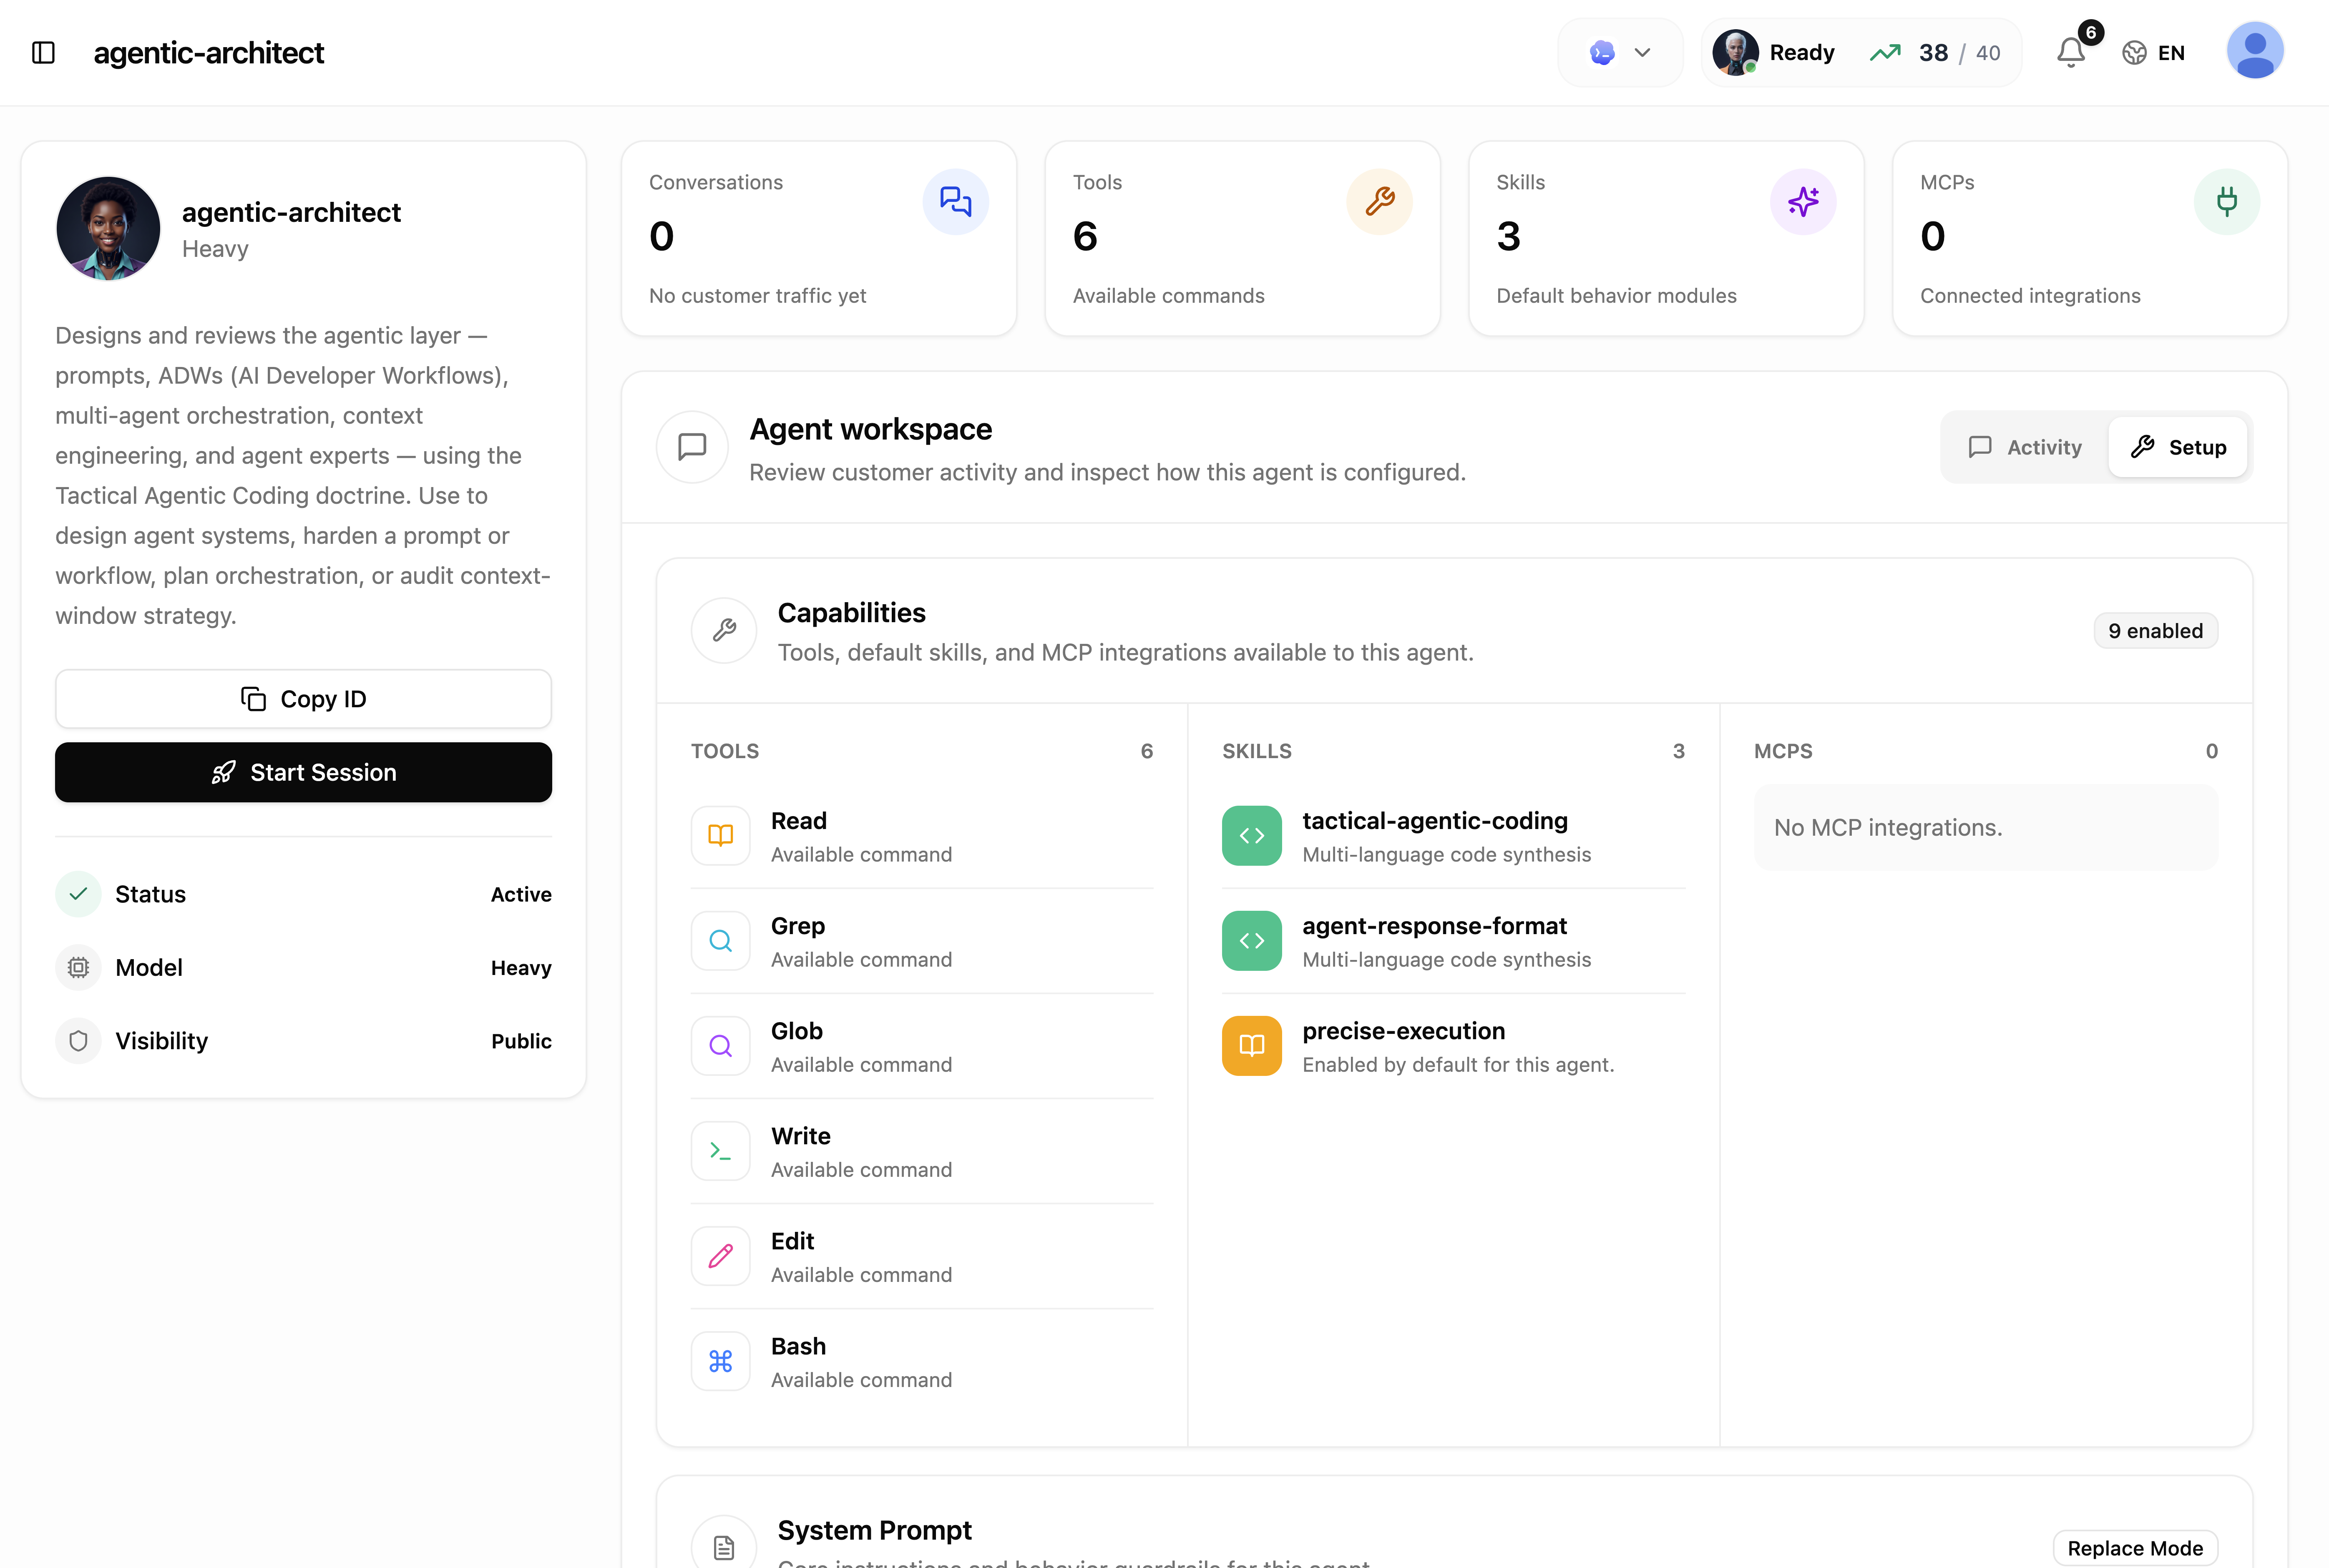
Reading the detail page
- The profile card — avatar, model, description, plus Copy ID and the Start Session button. Below it: Status (Active/Inactive), Last active, Orchestrator (if enabled), Model, and Visibility (Public, Private, or Team).
- Metric cards — Conversations (customer traffic), Tools, Skills, and MCPs at a glance.
- Agent workspace — two tabs:
- Activity — conversations customers have had with this agent through your connected channels (empty until the agent gets external traffic — see Hired agents).
- Setup — the agent's Capabilities (tools, default skills, and MCP integrations, column by column) and its System Prompt.
Some agents don't share their instructions: the prompt section then shows "Prompt is private". You can still inspect the agent's capabilities above it.
Starting a session
Click Start Session (the rocket).
Pick the workspace and project the agent should work in — the same picker as the composer target.
You land on a welcome screen for the agent. Type your first message — that's the moment the agent is actually hired into your project, with its tools, skills, and integrations configured.
The conversation then opens as a regular thread; the agent appears in the thread's Agents strip, and you can bring in others alongside it.
You don't have to start from the catalog. Describe the job to Charlie in any chat and it will find and hire the right agent itself — the catalog is for when you want to pick the specialist yourself.
Related pages
- Agents — the catalog
- Hired agents — agents serving your customers
- Inside a conversation — what agents look like in a thread