

Viewing Instances
CloudStation displays your instances in a visual card grid, making it easy to see the status of all your services at a glance. You can switch between List and Diagram views depending on your preference.
Accessing Your Instances
Navigate to your Workspace from the dashboard
Select the Project containing your instances
Click the Instances tab to see all your deployed services
Instance List View
The default view displays your instances as cards in a 4-column grid layout, organized into two sections.
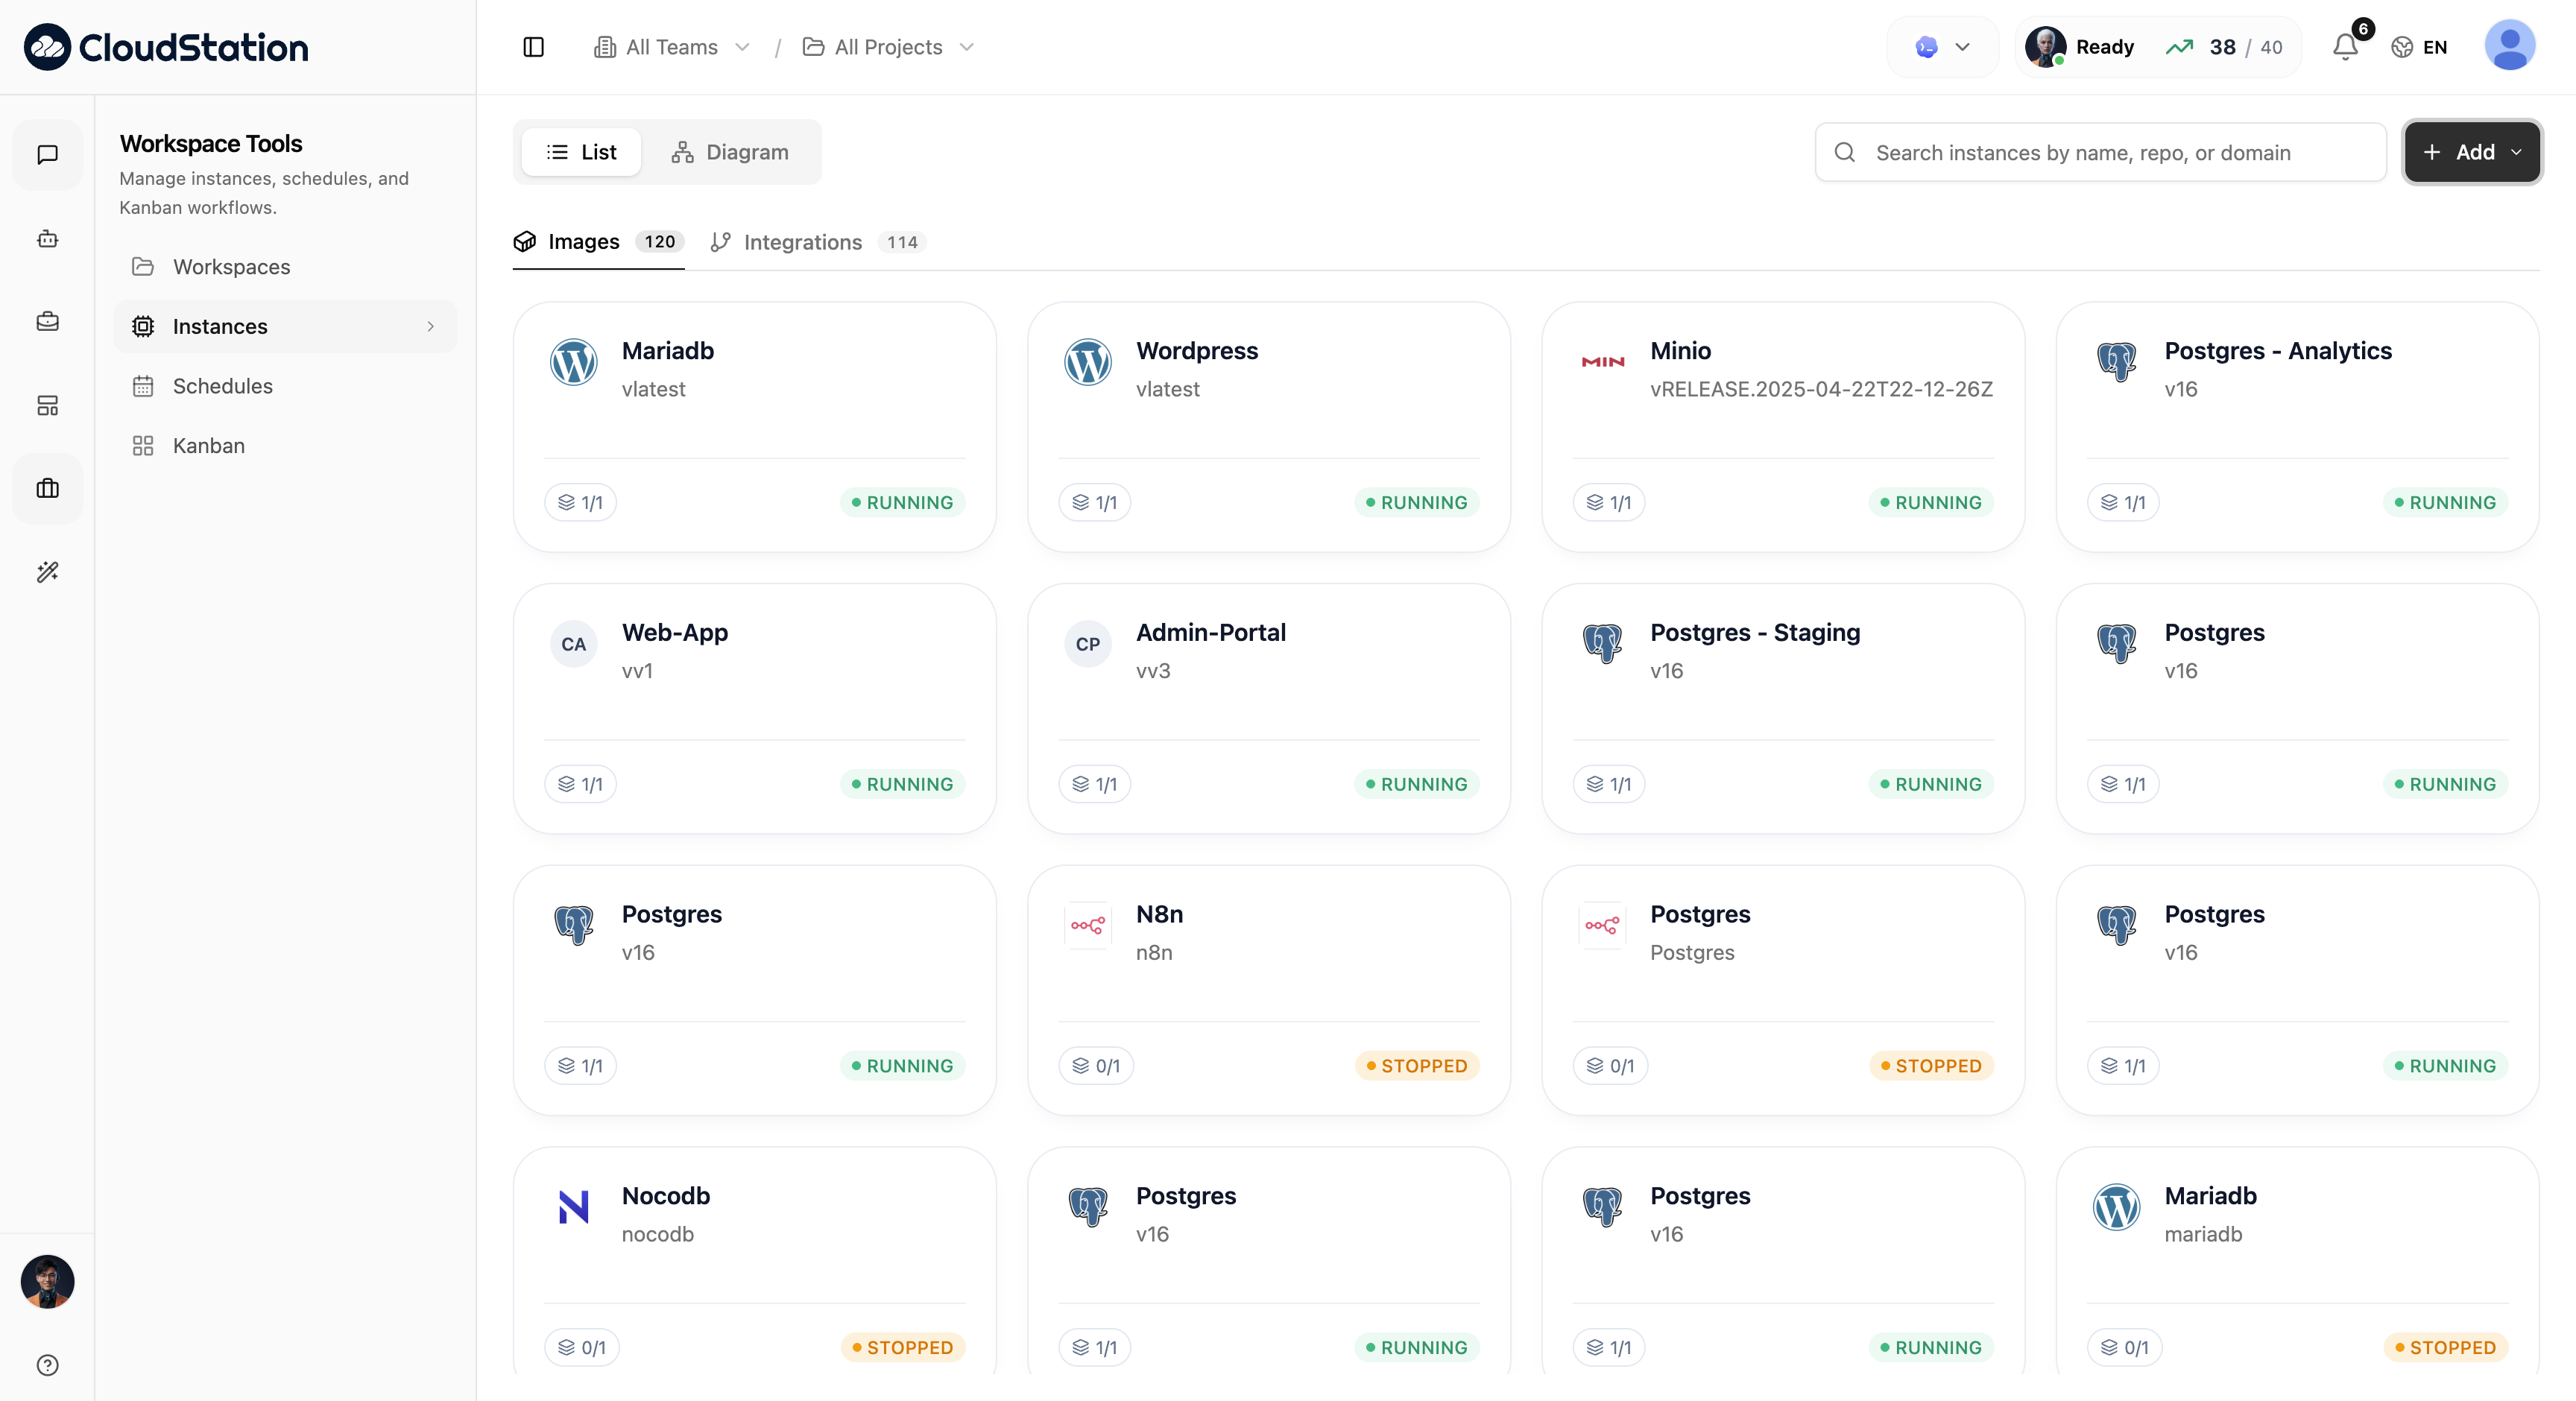
Images Section (Docker Services)
Each Docker-based service card displays:
- Service icon: Visual identifier for the service type
- Name: The service identifier (e.g., "Nocodb-Pro")
- Version/Status: Description or version information
- Replica count: Shows running vs total replicas (e.g., "1/1")
- Status badge: Current state (RUNNING, DEAD)
Integrations Section (Git Services)
Each Git-based service card displays:
- Service icon: Visual identifier for the integration
- Name: The service identifier
- Replica count: Running vs total replicas
- Status badge: Current state (FAILED, DEAD)
- Branch indicator: The deployed branch (main/master)
Switching Views
Use the view toggle buttons in the top-right corner:
- List: Card grid view (default)
- Diagram: Visual topology showing how services connect
Diagram View is useful when you need to understand how your services are connected and see the overall architecture of your project.
Instance Detail Panel
Click any instance card to open a slide-out detail panel on the right side of the screen. The panel provides complete access to instance configuration and management.
Header
The panel header shows:
- Instance name with status badge (e.g., "Nocodb-Pro" with green "Running" badge)
- Action buttons: Deploy (primary), Restart, Stop, Delete (trash icon)
Overview Tab
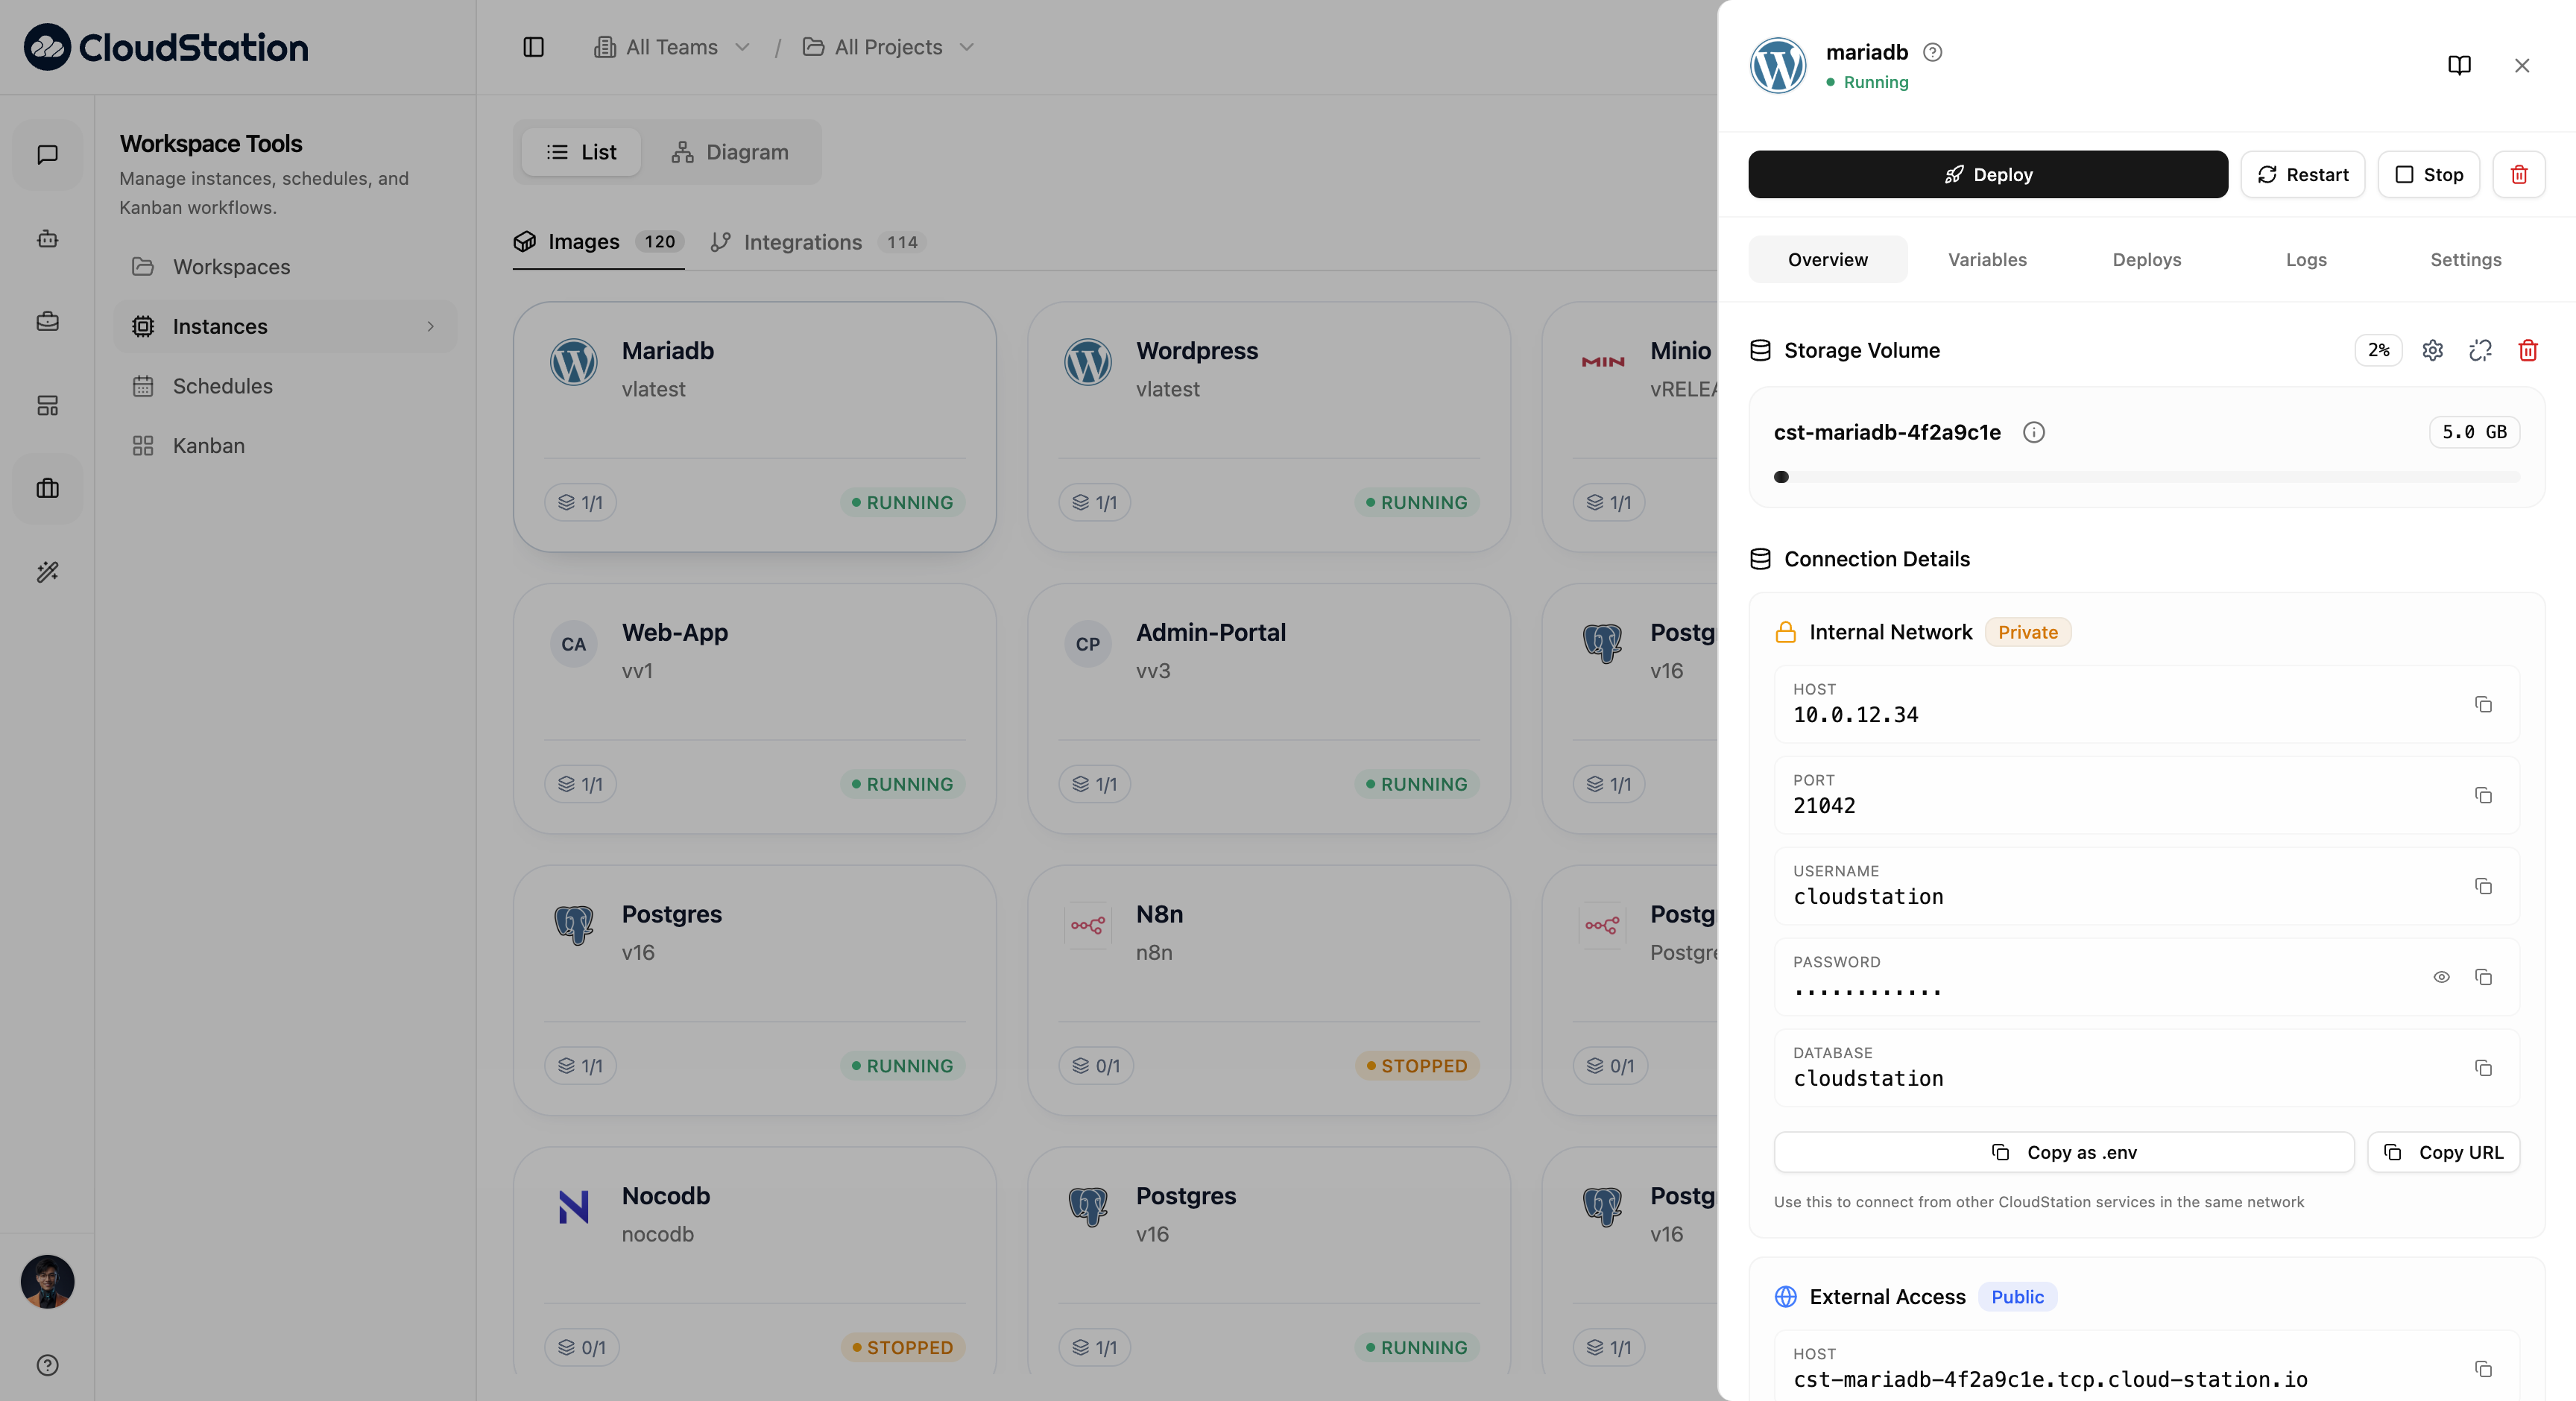
The Overview tab displays essential service information:
Storage Volume
- Volume name (e.g., "cst-nocodb-omvegdzp")
- Allocated size (e.g., "20.0 GB")
- Current usage percentage (e.g., "1%")
- Gear icon for settings and resize icon for adjustments
Custom Domain
- Shows "No custom domain configured" when none is set
- Displays the configured domain when active
- + Add Domain button (marked as Pro feature)
Your App URLs
- Service URL (e.g.,
https://nocodb-nrgaxxlb.cloud-station.app) - Status badges: Verified, SSL, active
- Copy and edit icons for quick actions
Variables Tab
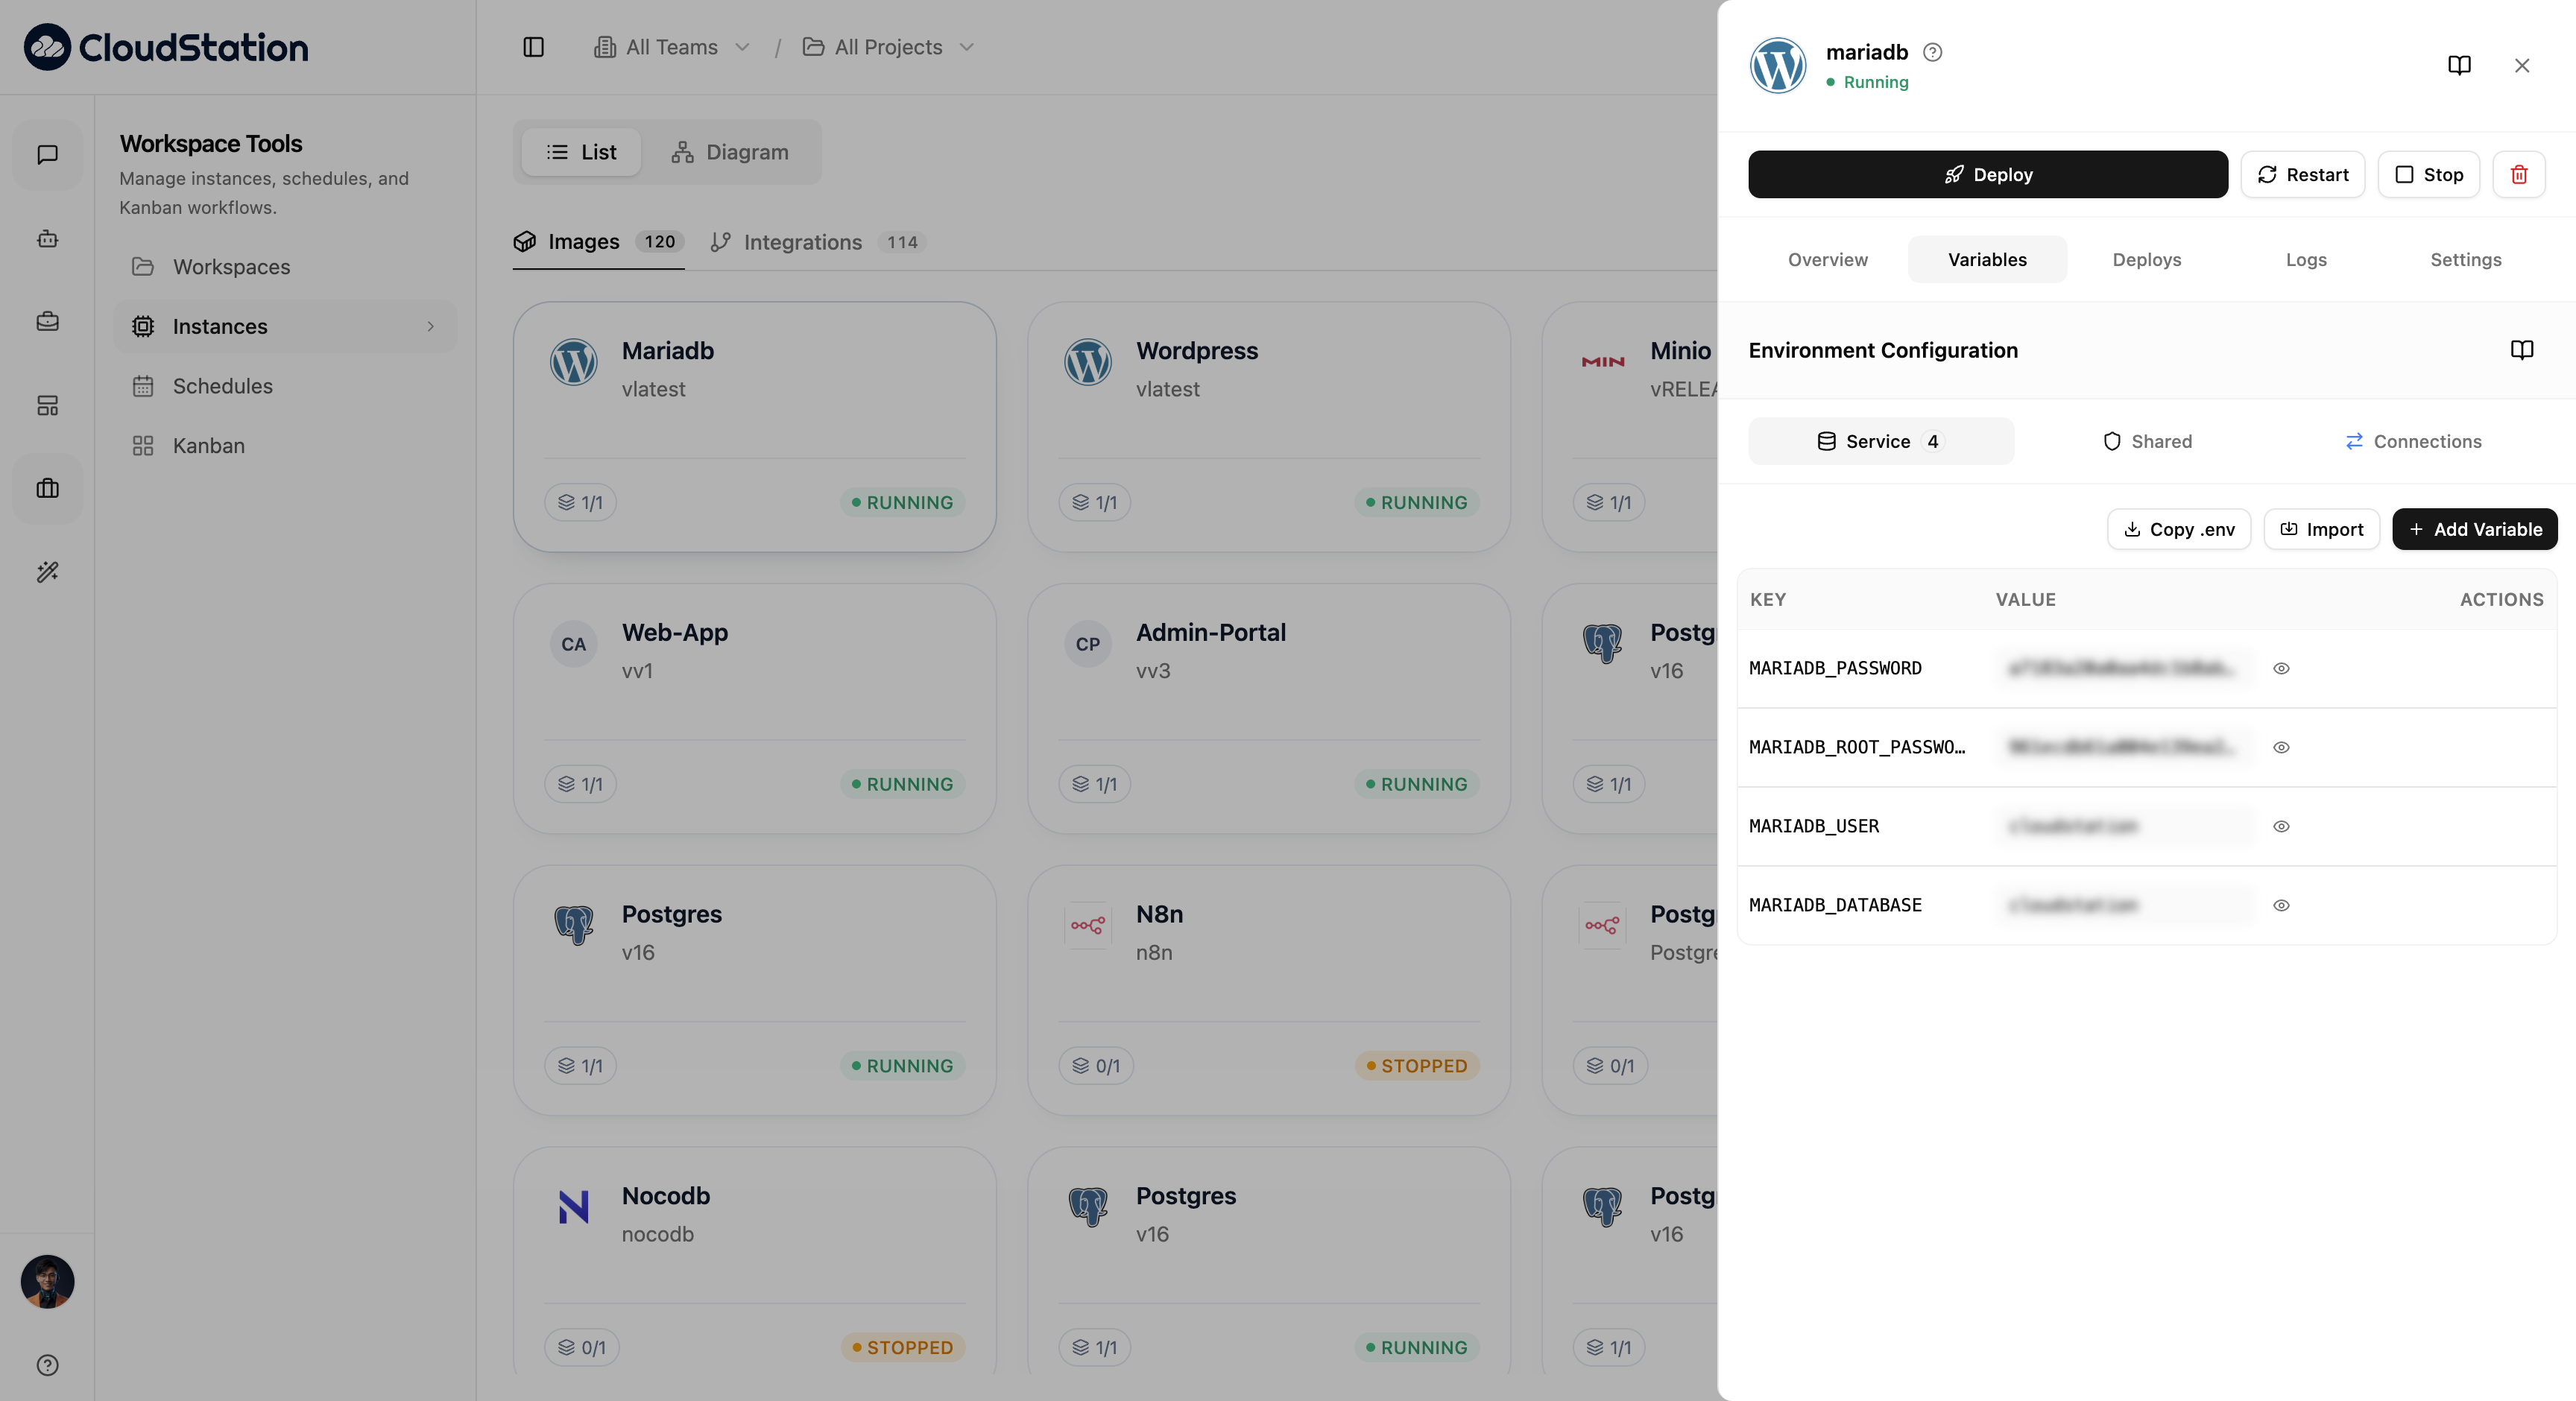
Manage environment variables for your service.
Environment Configuration heading with three scope tabs:
Variables specific to this instance only. The tab shows a count of service-level variables.
Auto-generated connection variables for linked services. The tab shows a count of connection variables.
Action buttons:
- Copy .env: Export all variables in .env format
- Import: Bulk import variables from a file
- + Add Variable: Create a new environment variable
Variables table with columns:
- KEY: Variable name
- VALUE: Variable value (masked by default)
- ACTIONS: Edit and delete options
Variable values are masked by default for security. Click the eye icon to reveal the value.
Deploys Tab
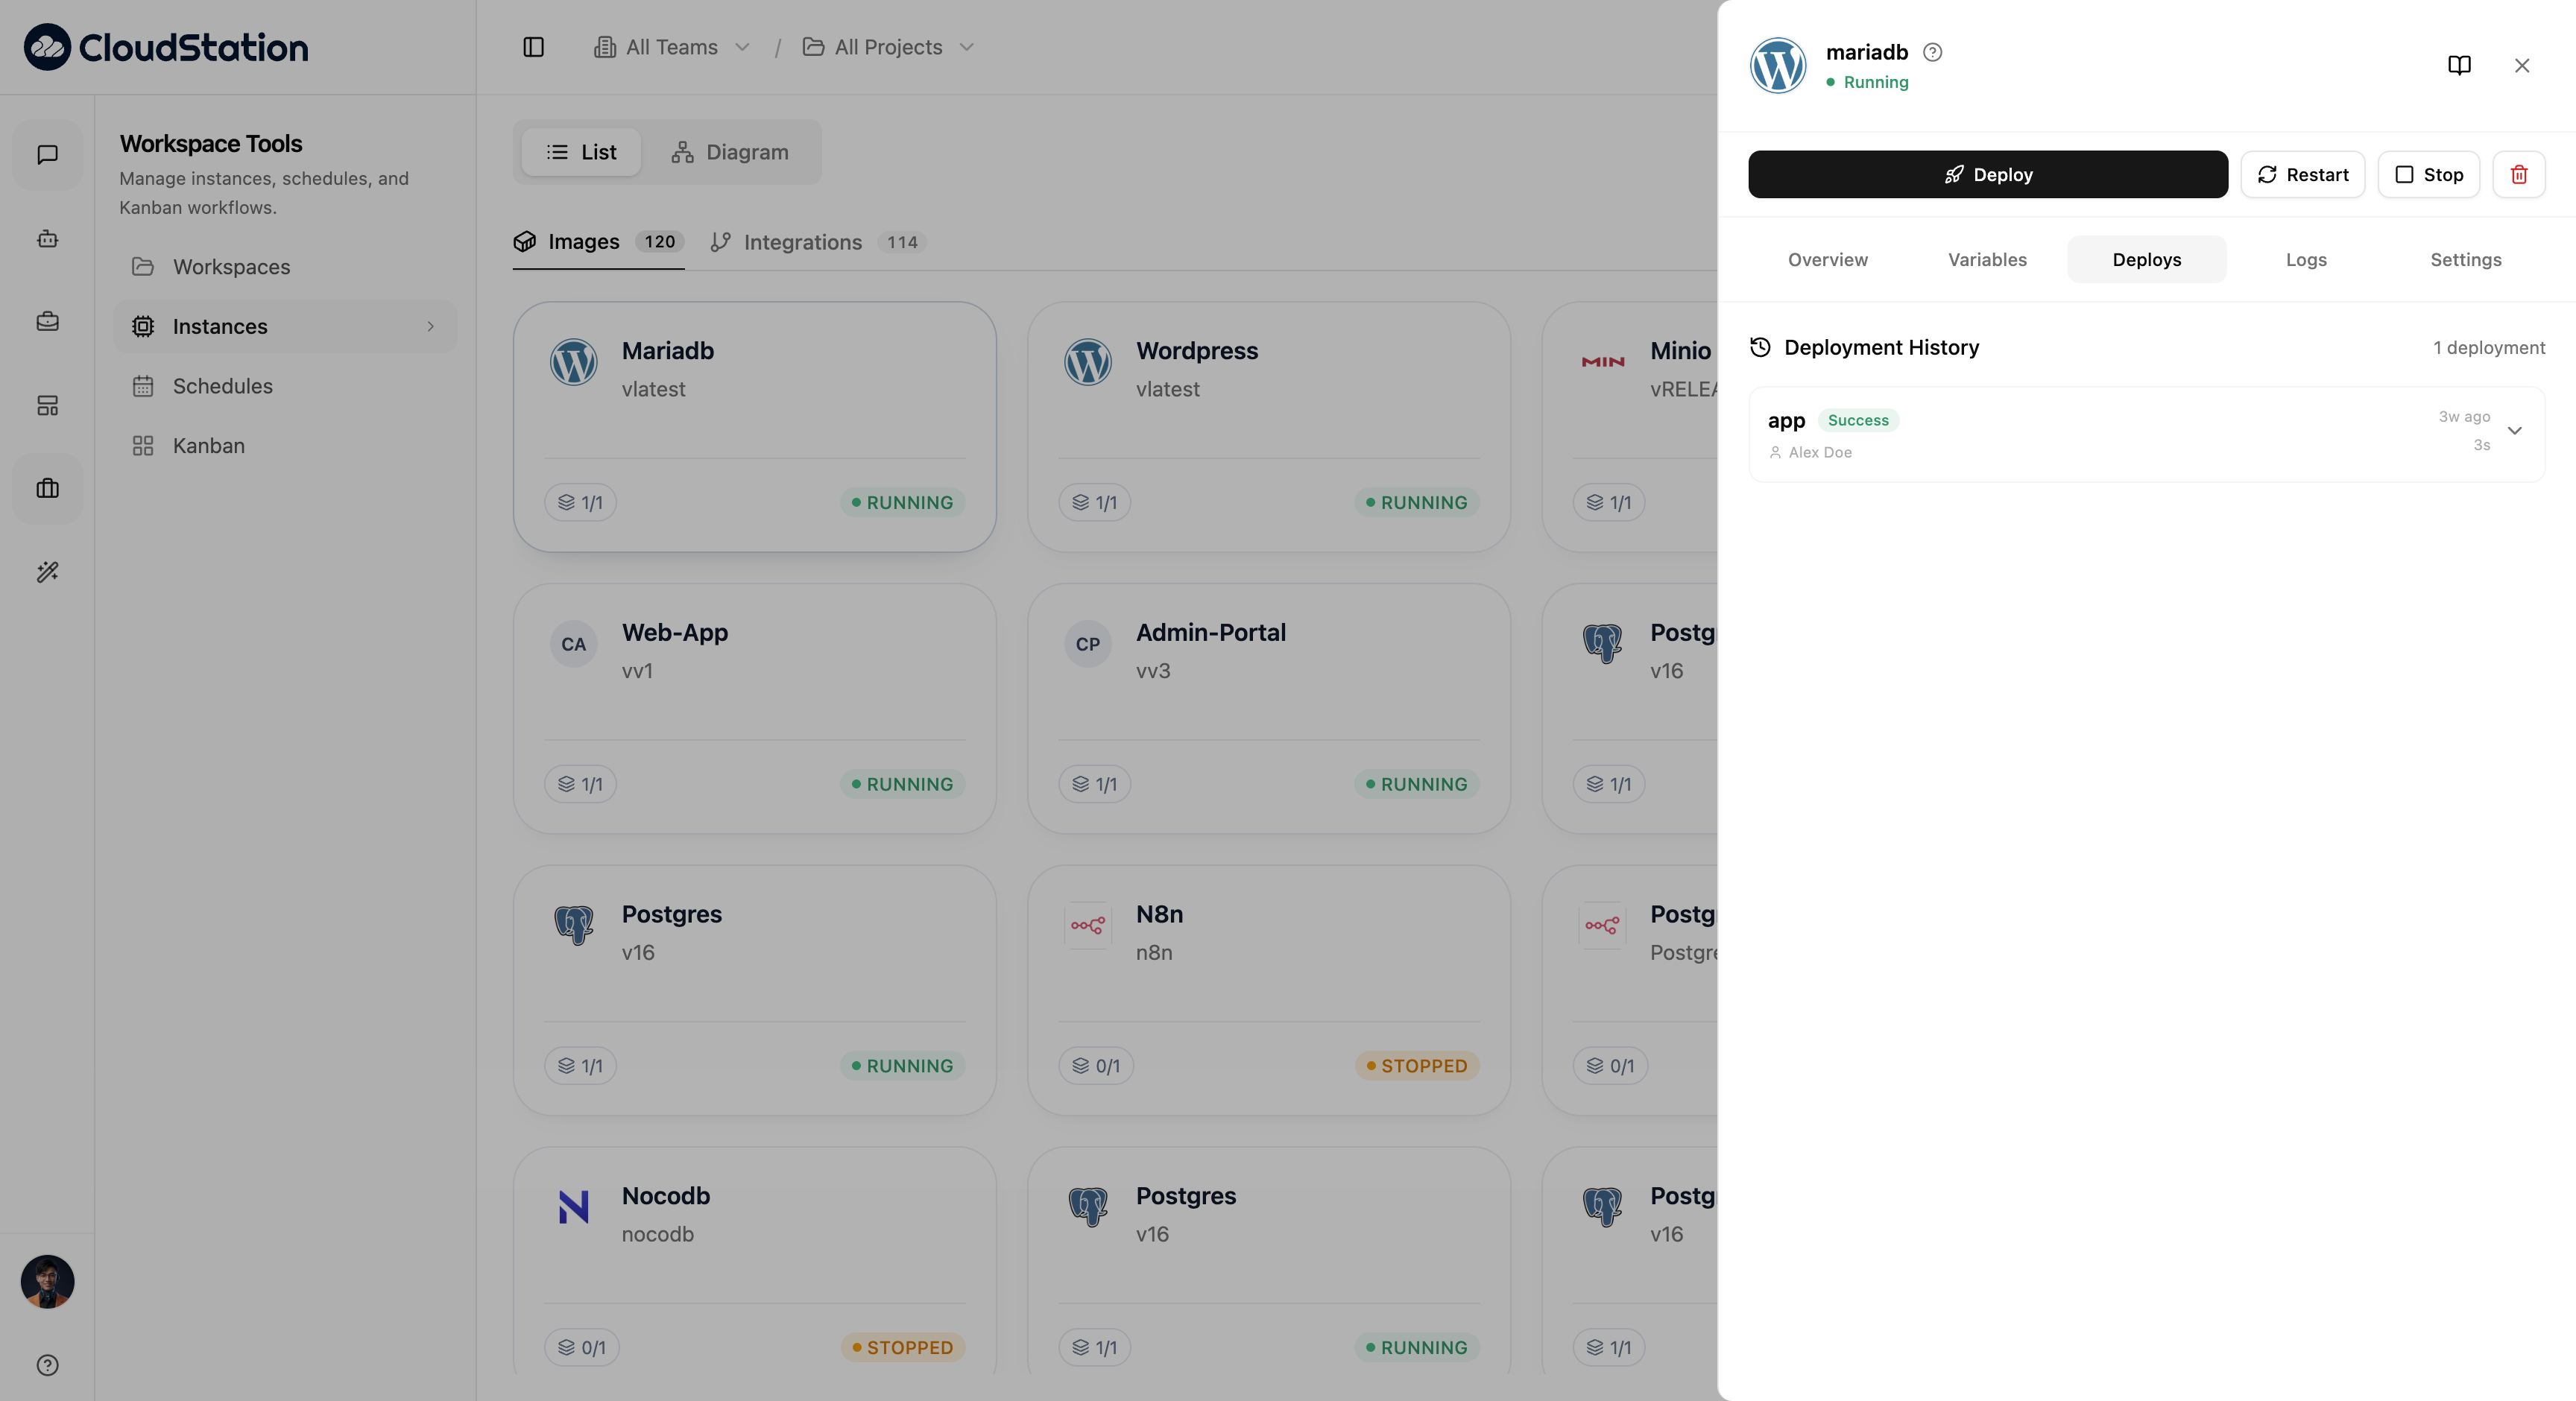
View the complete deployment history for your service.
Deployment History heading shows the total number of deployments.
Each deployment entry includes:
- Docker image name: The deployed image
- Status badge: Success, Cancelled, or In Progress
- Deployer name: Who triggered the deployment
- Timestamp: When the deployment occurred
- Duration: How long the deployment took
Entries are listed chronologically with the most recent deployment first.
Logs Tab
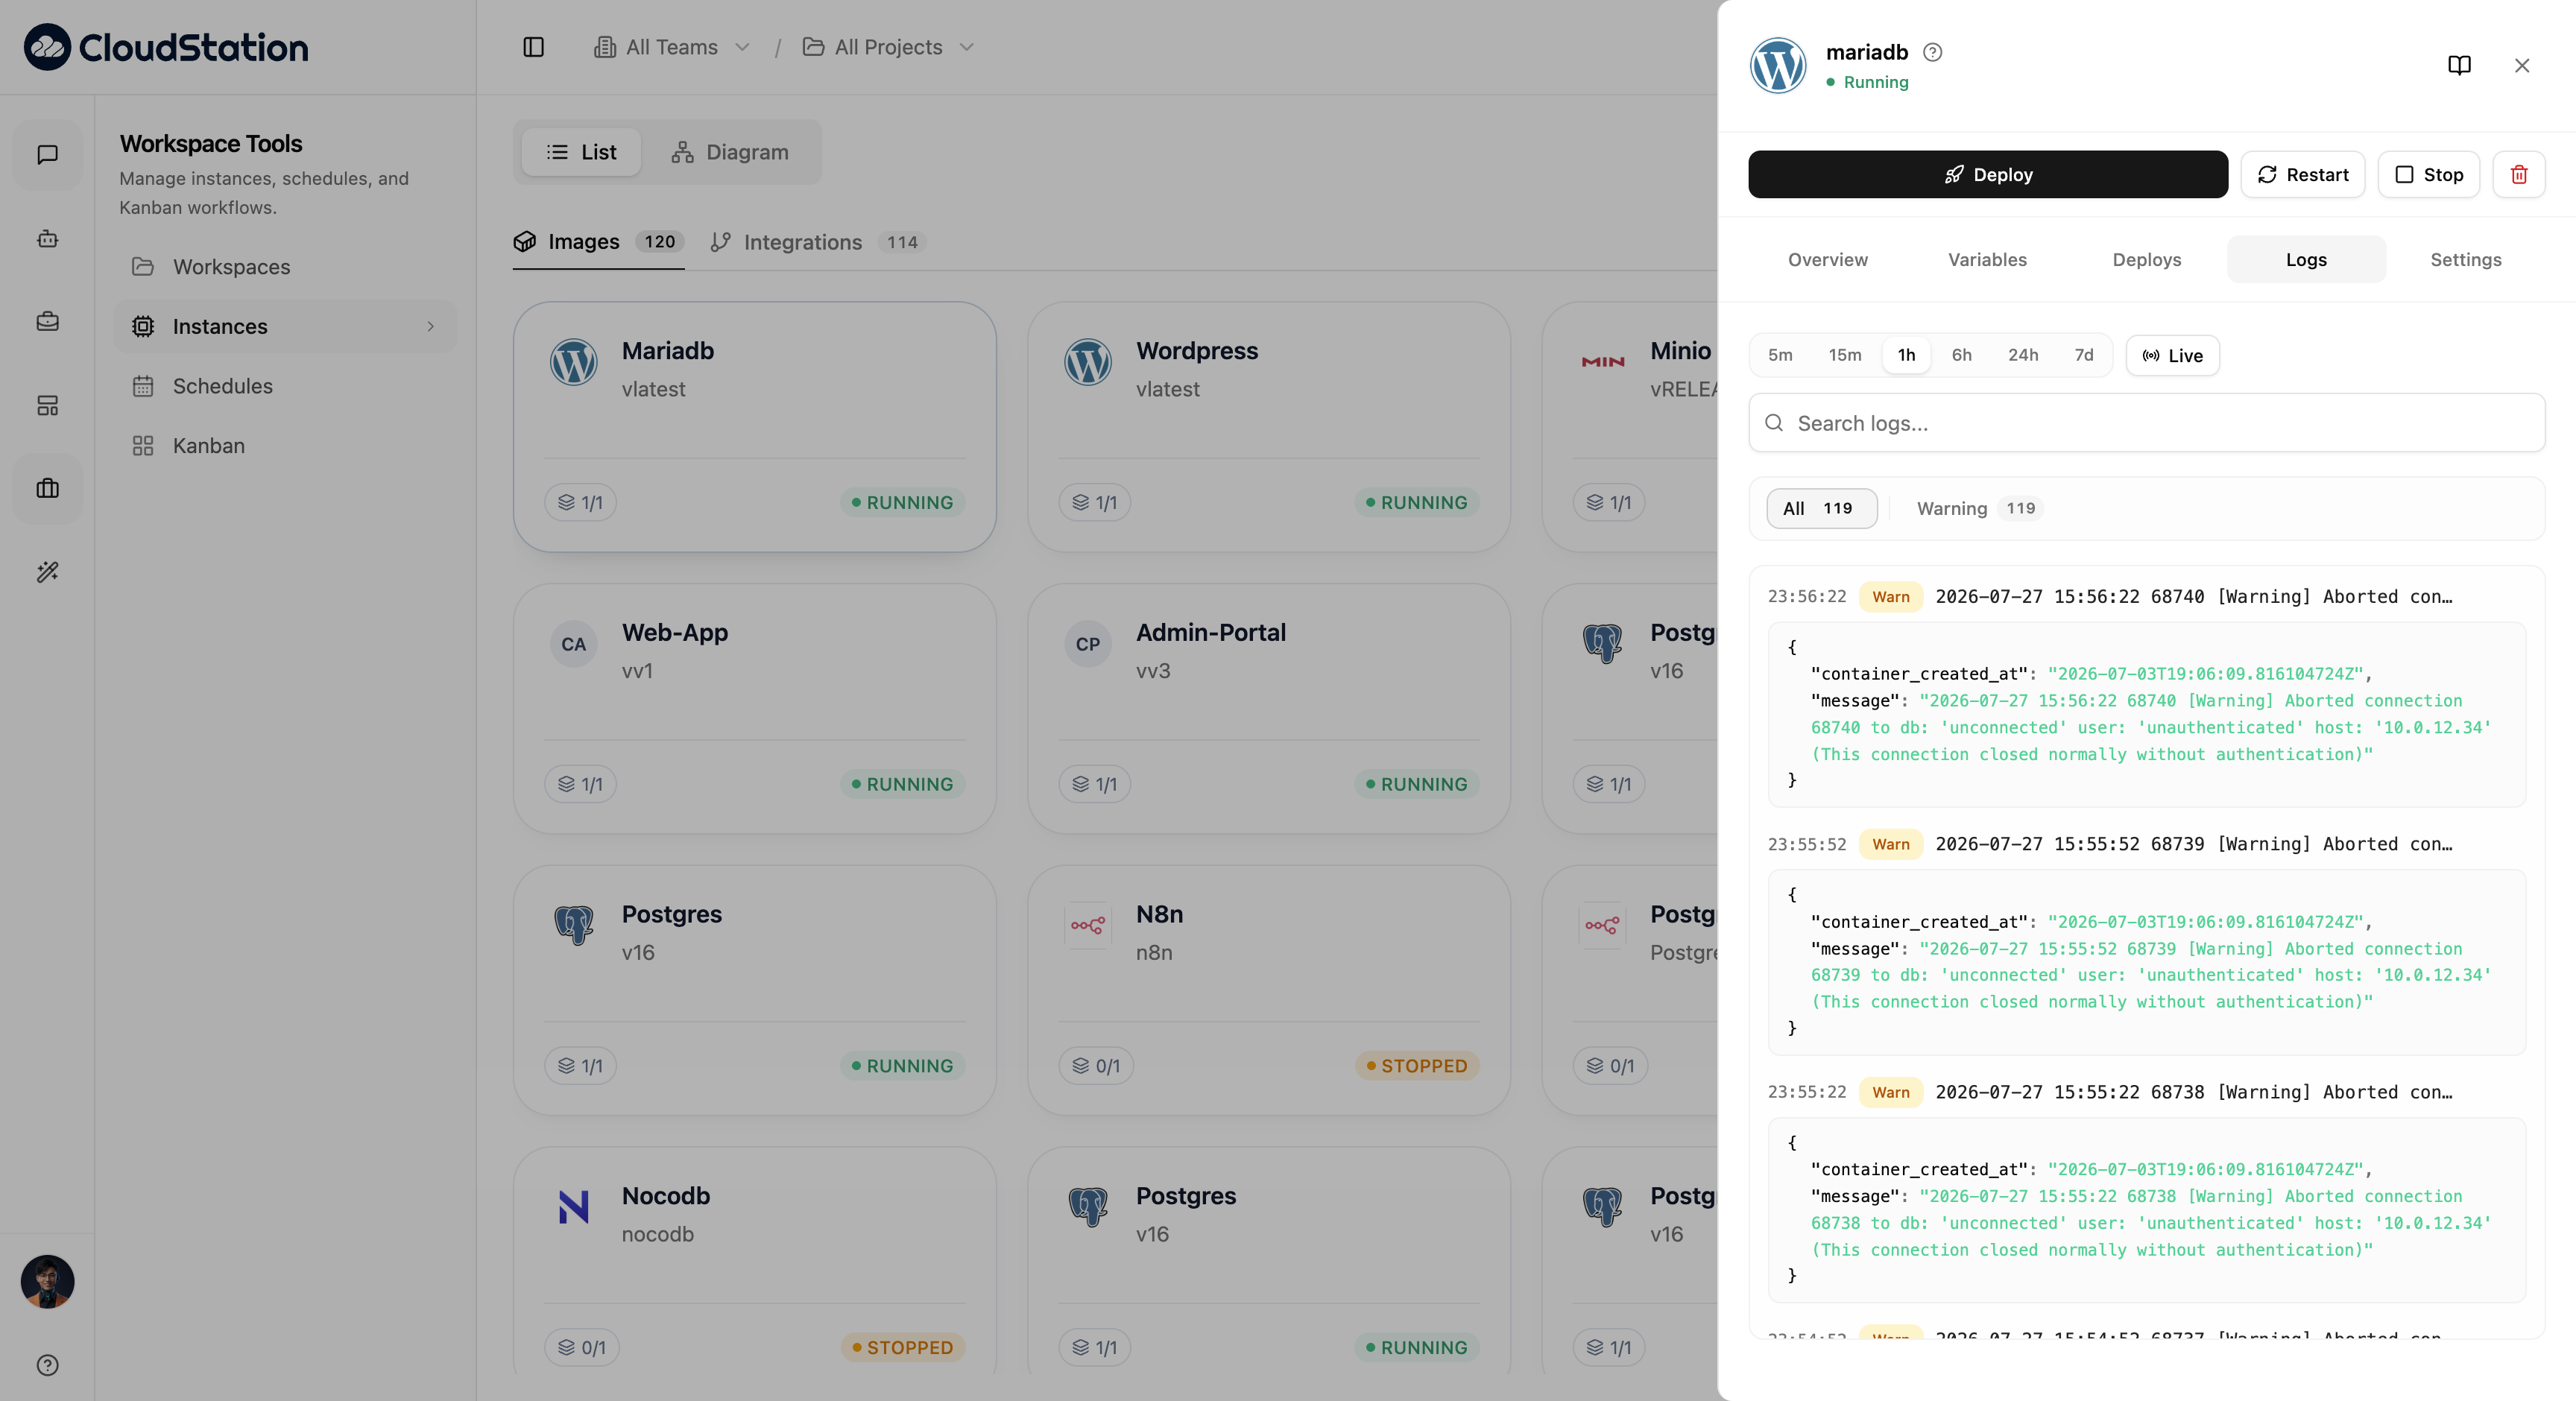
View real-time and historical logs from your service.
Time range filter buttons: 5m, 15m, 1h, 6h, 24h, 7d, Live
Search bar: Filter logs by keyword with "Search logs..." placeholder
Log output area: Displays log entries or "No logs found" when empty
Use the Live filter to stream logs in real-time while debugging issues or monitoring deployments.
Settings Tab
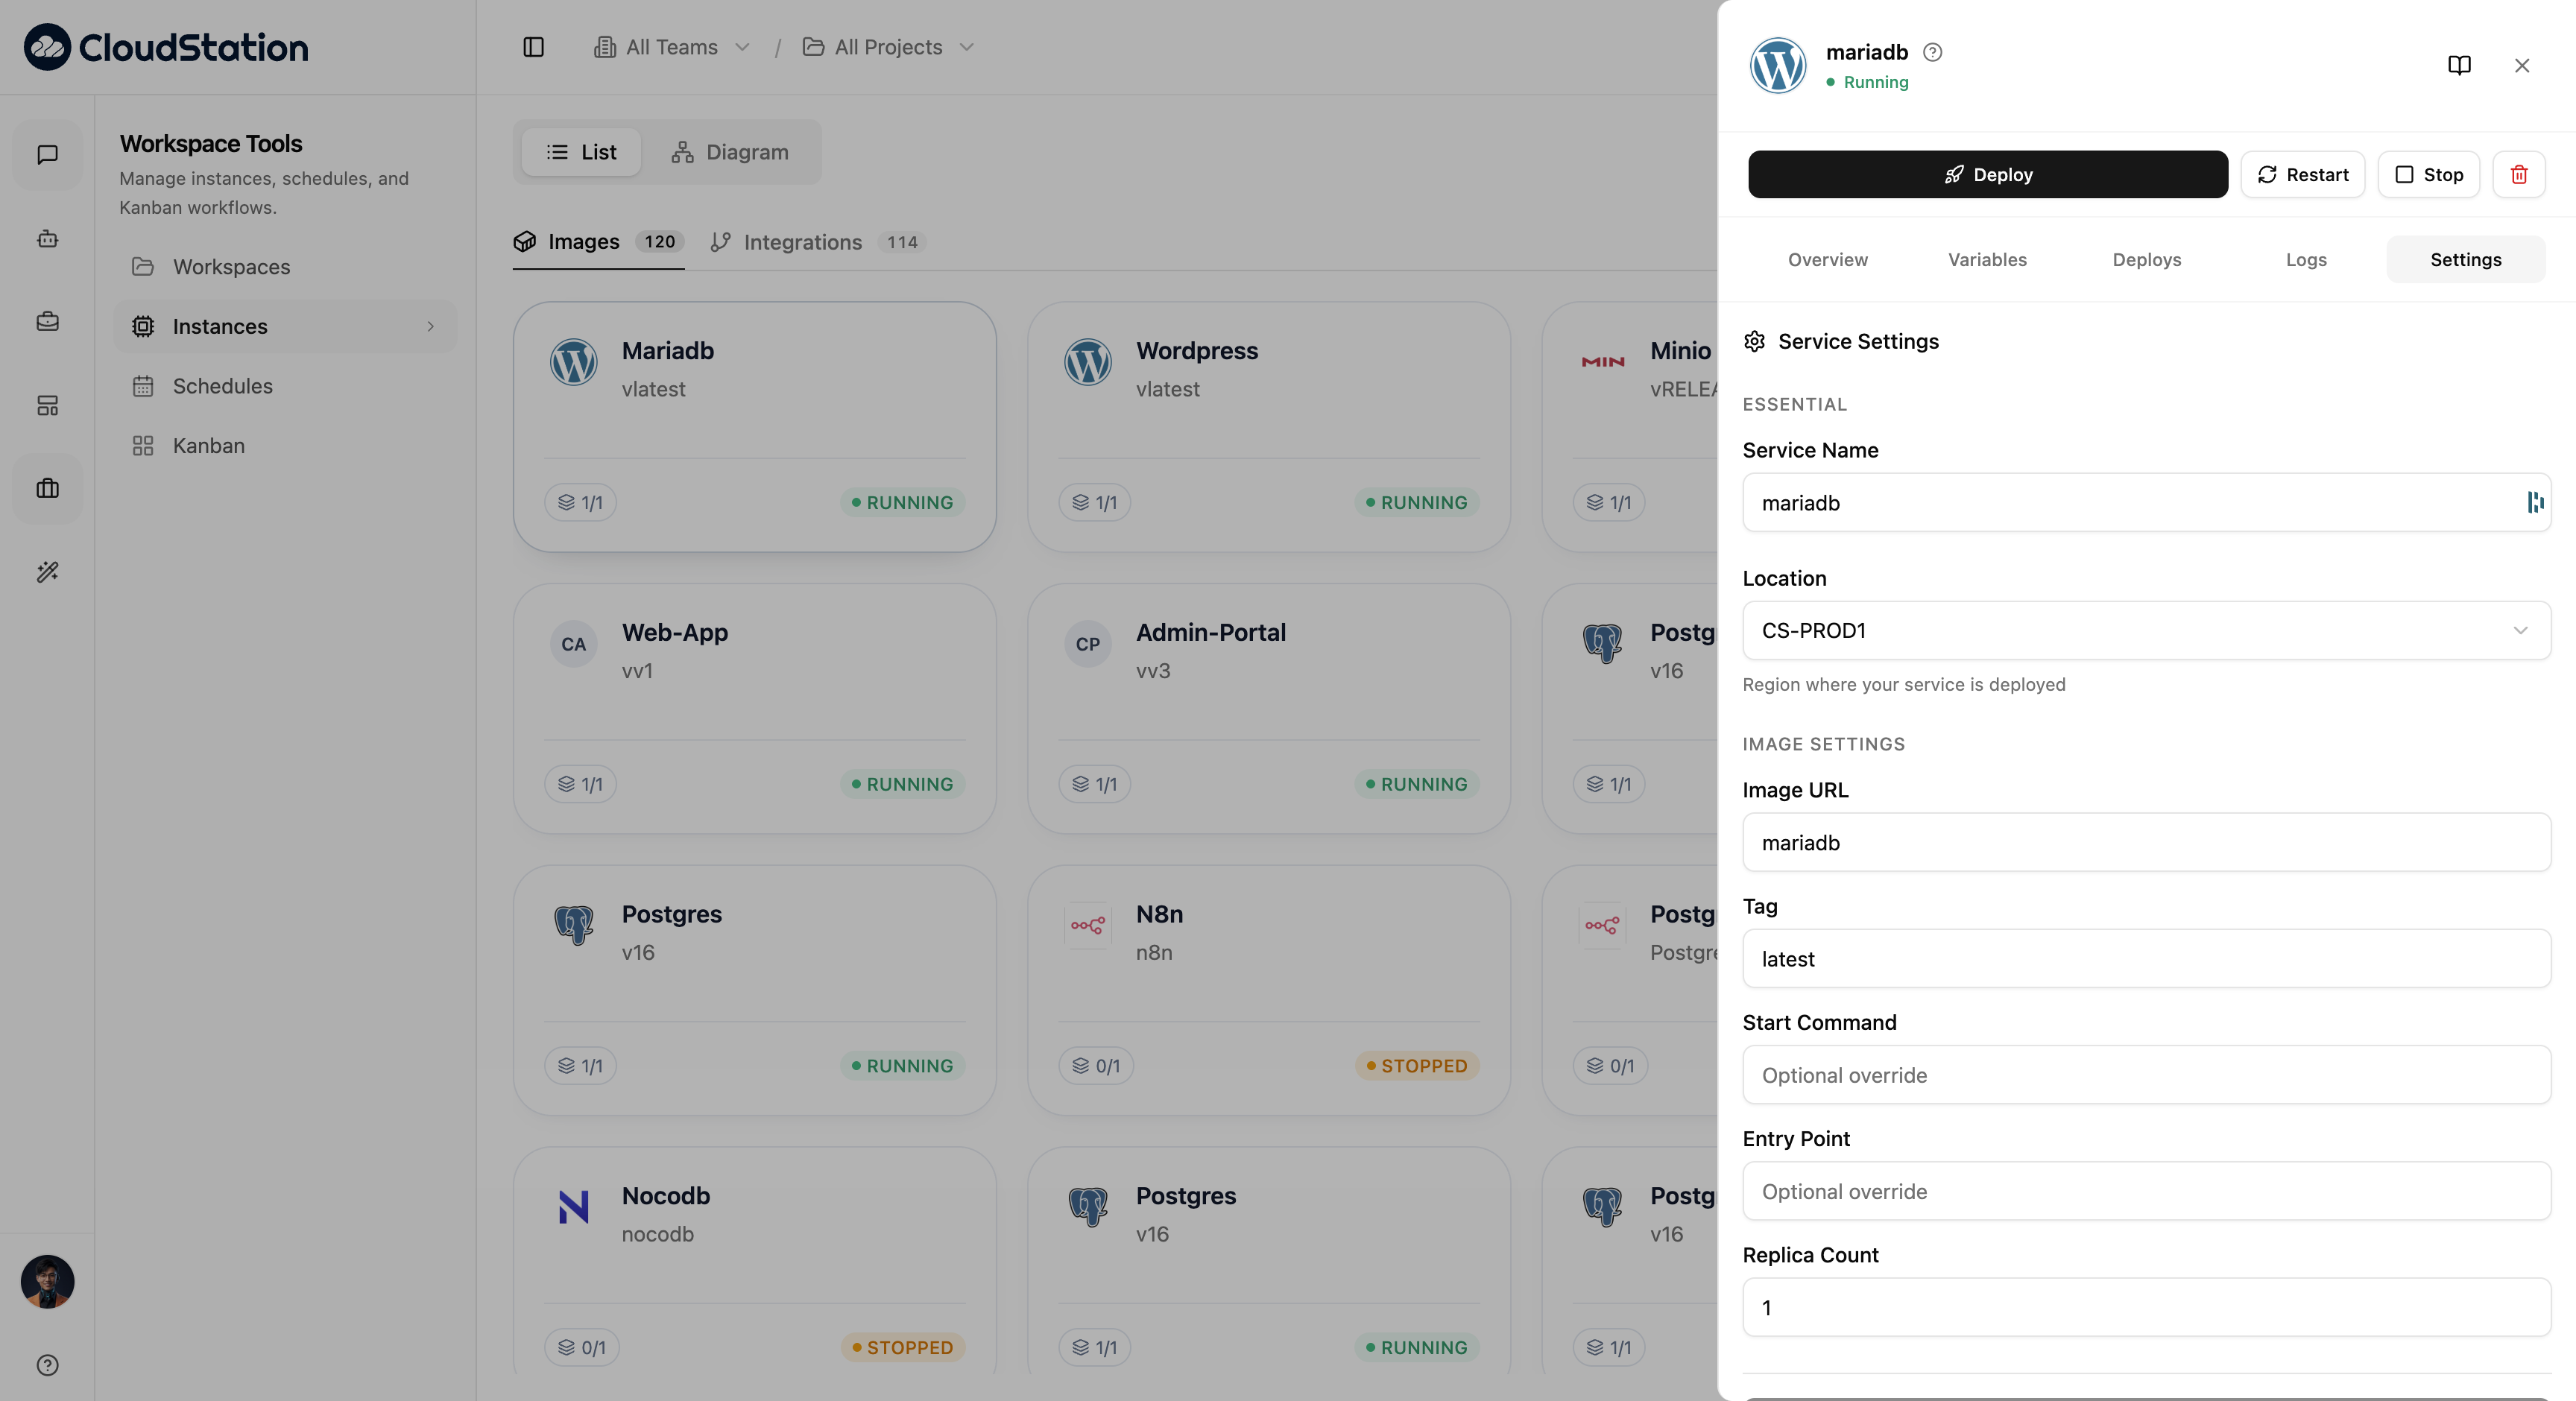
Configure service settings for your instance.
Service Settings heading with two sections:
ESSENTIAL
- Service Name: The display name for your instance
- Location: Region dropdown to select deployment location
IMAGE SETTINGS
- Image URL: The Docker image registry path
- Tag: Image version tag
- Start Command: Optional override for the container start command
- Entry Point: Optional override for the container entry point
- Replica Count: Number of container replicas to run
Click Save Settings at the bottom to apply changes.
Changing the image URL or tag will trigger a new deployment. Ensure your new image is compatible before saving.
Common Actions
Deploying Updates
- Click the instance to open the detail panel
- Click the Deploy button in the header
- CloudStation pulls the latest image and redeploys
Restarting a Service
- Click the instance to open the detail panel
- Click Restart in the header
- The service restarts without redeploying
Stopping a Service
- Click the instance to open the detail panel
- Click Stop in the header
- The service stops running but configuration is preserved
Deleting an Instance
- Click the instance to open the detail panel
- Click the trash icon in the header
- Choose to delete this service only or all template services
- Confirm deletion when prompted
See Deleting Instances for the full walkthrough, including bulk deletion of template services.
Next Steps
- Deploy a new service - Add more instances to your project
- Configure environment variables - Manage your service configuration
- Set up volumes - Add persistent storage to your services
- Monitor your services - Set up health checks and alerts