

Project Settings
Configure project details, API integrations, and website chat widgets.
Project Settings let you configure your project's details, backend API integrations, and customer-facing website chat widgets. Settings open in a side drawer from your project card.
Opening Project Settings
To access project settings:
- Navigate to the Projects & Sessions page
- Click the settings icon (gear/sliders) on any project card
- A dropdown menu appears with three options:
- Project Settings - Opens the settings drawer
- Set as WhatsApp Project - Designate this project for WhatsApp integration
- Delete Project - Remove the project (shown in red)
- Click Project Settings to open the drawer
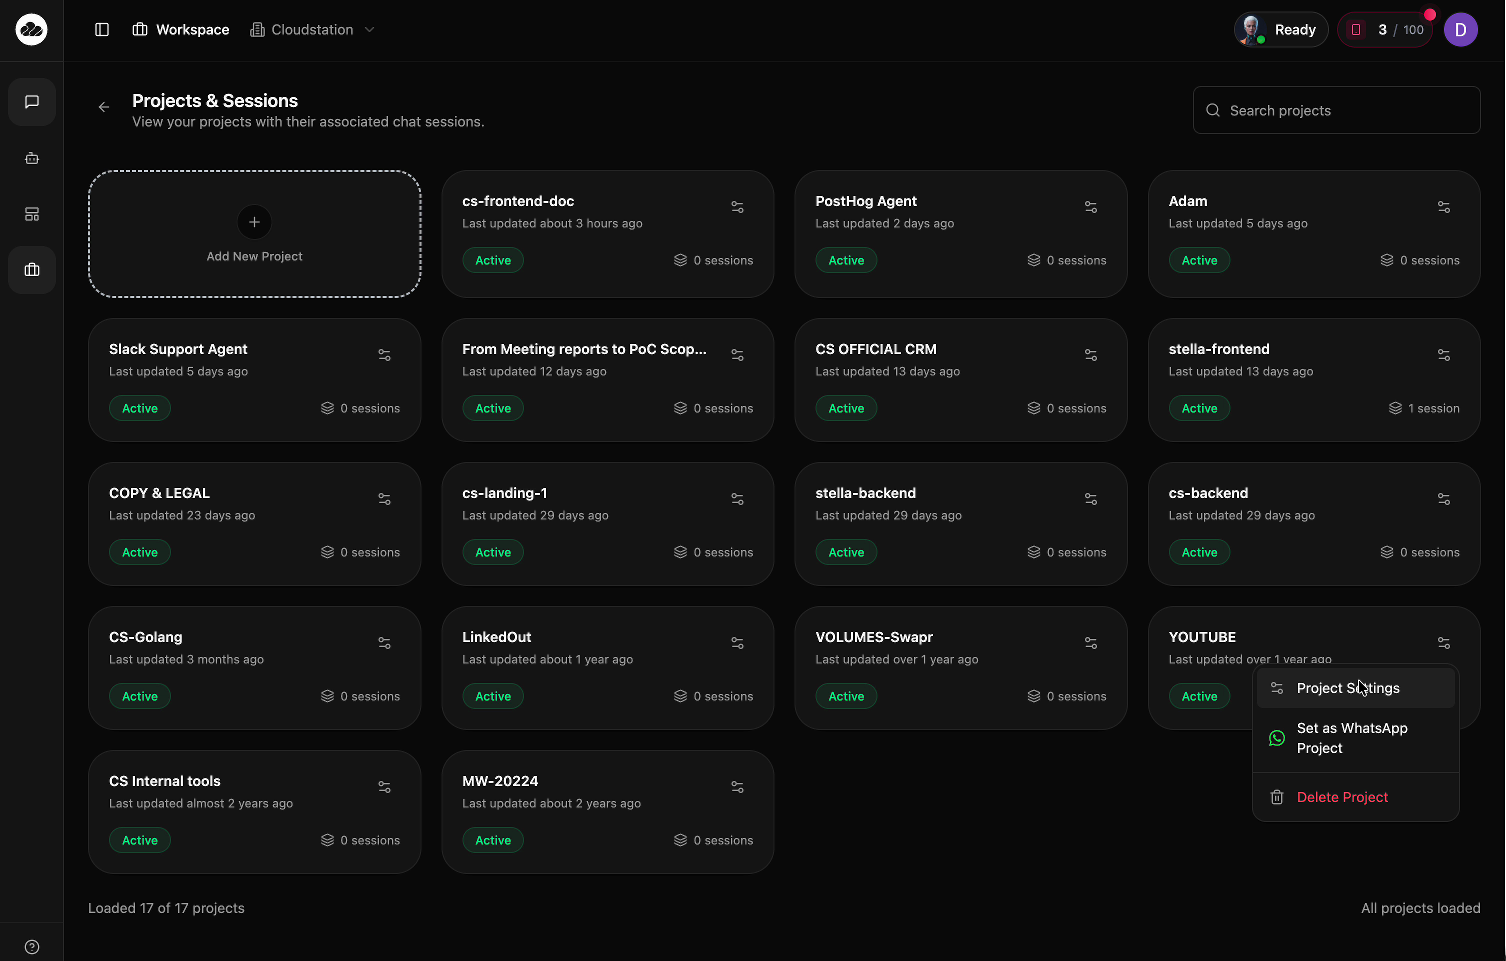
The settings drawer slides in from the right side of the screen.
Settings Drawer Layout
Header
The drawer header contains:
- Editable project name - Click the pencil icon to edit inline
- Subtitle: "Manage your project settings"
- Checkmark button (green) - Save name changes
- X button - Close the drawer
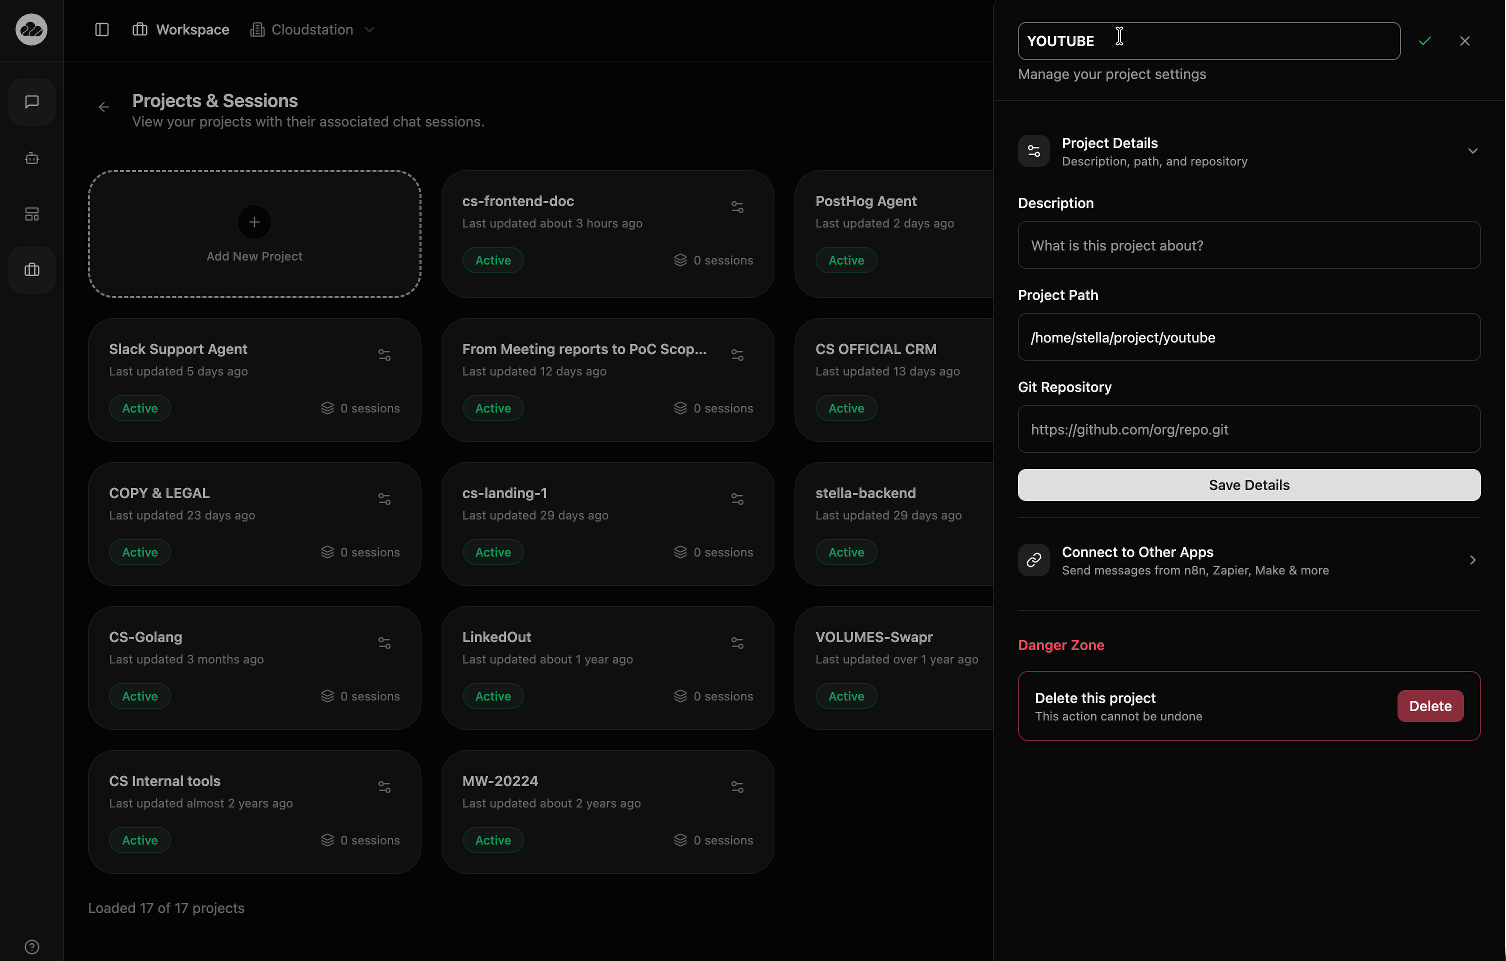
Project Details
This collapsible section contains basic project configuration. Click to expand.
- Icon: Settings/sliders icon
- Description: "Description, path, and repository"
When expanded, you'll see three fields:
Description
A text field for describing your project's purpose. Placeholder: "What is this project about?"
Project Path
The project's file path on the system. Example: /home/user/project/youtube
Git Repository
Connect a Git repository URL. Supports GitHub, GitLab, Bitbucket, and other Git providers.
Click Save Details at the bottom of this section to save your changes.
Connect to Other Apps
This collapsible section shows how to integrate with your project programmatically from trusted backend tools.
- Icon: Link/chain icon
- Description: "Send messages from n8n, Zapier, Make & more"
When expanded, you'll find:
Your Project URL
A unique Agents API endpoint URL with a copy button:
https://charlie-back.cloud-station.io/v1/projects/{project_id}/conversations/{conversation_id}/messagesUse the URL exactly as shown in your own Project Settings — charlie-back.cloud-station.io is the live production host for this API.
Integration Instructions
Toggle Show how to connect to reveal setup details:
Method: POST
Headers:
{
  "Content-Type": "application/json",
  "x-api-key": "YOUR_API_KEY",
  "x-client-id": "YOUR_CLIENT_ID"
}
Body (JSON):
{
  "conversation_id": "my-conversation-1",
  "message": "Hello, how can you help me?"
}
For bot integrations, the Agents API also supports platform, sender, external_message_id, content_blocks, agent_template_id, and response_webhook.
Use Agents API credentials only from backend/server code. Do not put x-api-key or x-client-id in a public website. Use the Website Chat Widget for browser-based chat.
Each code block has a copy button for quick access.
Getting Your API Key
Click Get your API Key at the bottom of this section. This opens the Settings modal where you can create and manage API keys.
Learn more:
Website Chat Widget
This collapsible section lets you add a secure AI support chat to a public website or logged-in product area.
Use it when visitors should talk to a selected CloudStation agent from a browser. Unlike the Agents API, the widget does not expose API keys, client IDs, Project IDs, owner IDs, or private agent template IDs to the page.
When expanded, you'll find:
Guided Setup
The widget setup follows this flow:
- Pick your agent - Choose the CloudStation agent that should answer website visitors.
- Customize the greeting - Set the display name, avatar override, welcome message, first message, and suggested prompts.
- Copy the install code - Paste the generated script snippet into your website.
Chat Experience
Configure the visitor-facing parts of the widget:
- Widget ID - Public ID used by the install snippet.
- Display name - Name shown in the widget header.
- Support agent - Private backend routing target.
- Agent picture URL override - Optional custom avatar.
- Welcome message / first message - Initial text shown to visitors.
- Suggested prompts - Quick-start questions visitors can click.
- Enabled - Turn the widget on or off.
- Require login - Restrict the widget to authenticated users.
For a widget on a public website, keep Require login off and add your site's exact origin under Allowed websites. These two settings live here — not in the Widget Designer section — and are the most common reason a freshly embedded widget fails: a missing origin causes a CORS "Could not load" error, and Require login causes "Authentication required" (HTTP 401) on every visitor message.
Install Code
The install card provides a snippet like this:
<script
  src="https://app.cloud-station.io/widgets/chat.js"
  data-widget-id="customer-support"
  data-api-base-url="https://charlie-back.cloud-station.io"
  data-primary-color="#f97316"
  data-accent-color="#fed7aa"
  data-surface-color="#fffaf3"
  data-position="right"
  data-launcher-label="Ask support">
</script>
Advanced Controls
Advanced controls include:
- Allowed websites - Origins where the widget may run.
- Messages per user/visitor per day - Per-user or per-anonymous-visitor daily limit.
- Messages per minute - Burst protection.
- Total widget messages per day - Project-wide daily cap.
- Max message length - Maximum visitor message size.
Allowed websites must be origins, not page URLs:
https://example.com
https://www.example.com
http://localhost:8899
Do not use:
file://...
null
https://example.com/pricing
For local testing, serve your HTML over HTTP. For example: cd ~/Downloads && python3 -m http.server 8899, then open http://localhost:8899/your-file.html.
Learn more in Website Chat Widget.
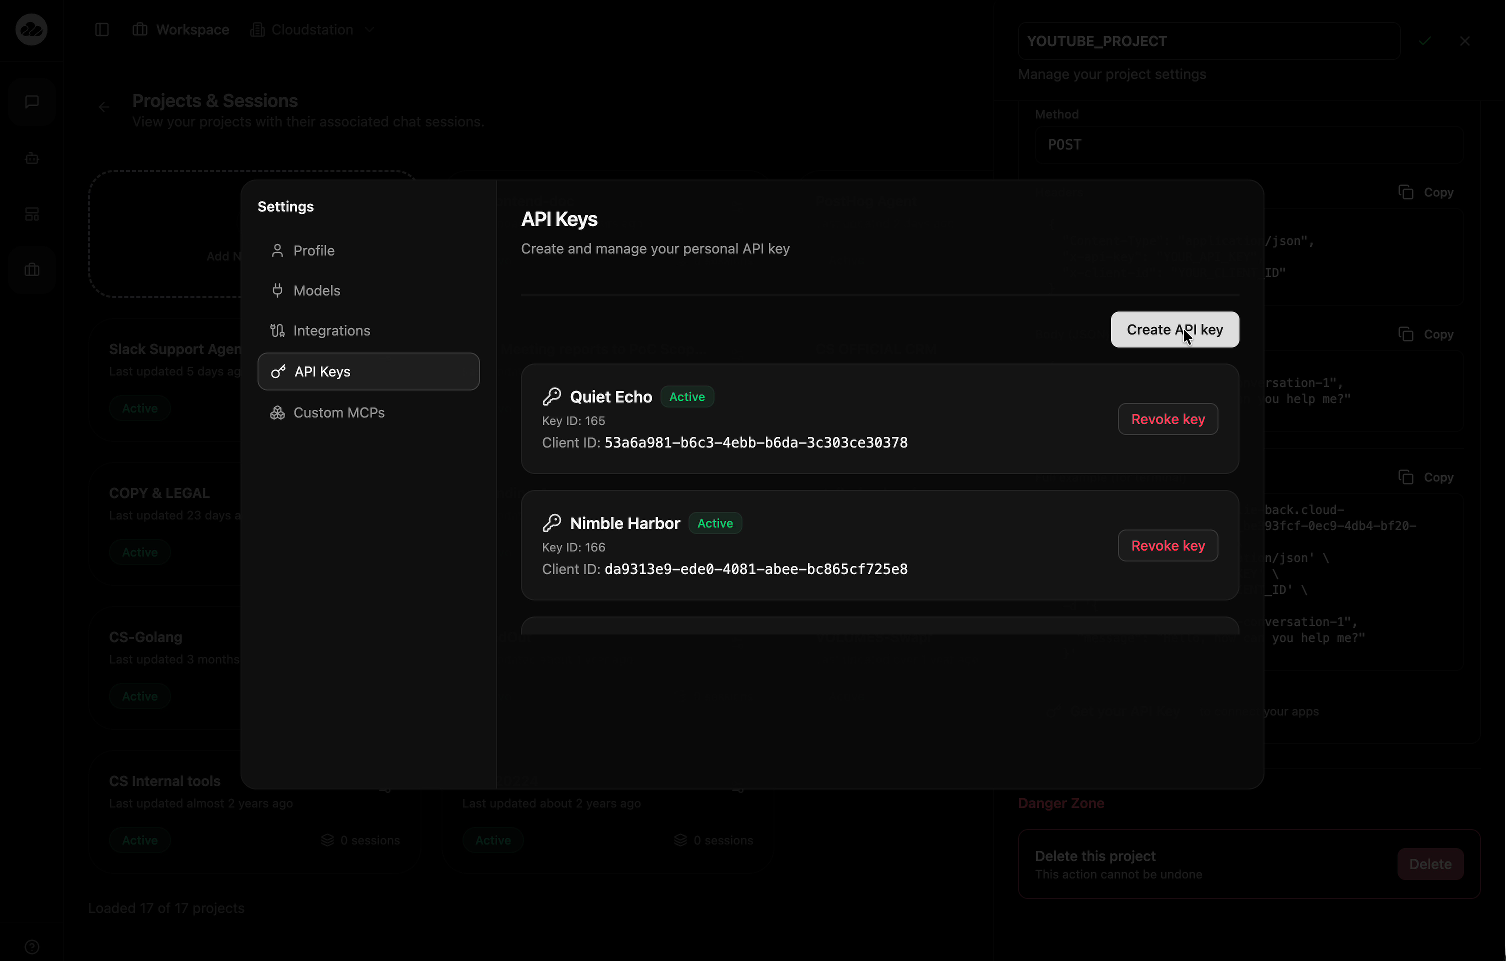
API Keys
Clicking "Get your API Key" opens a Settings modal with sidebar navigation:
- Profile
- Models
- Integrations
- API Keys (selected)
- Custom MCPs
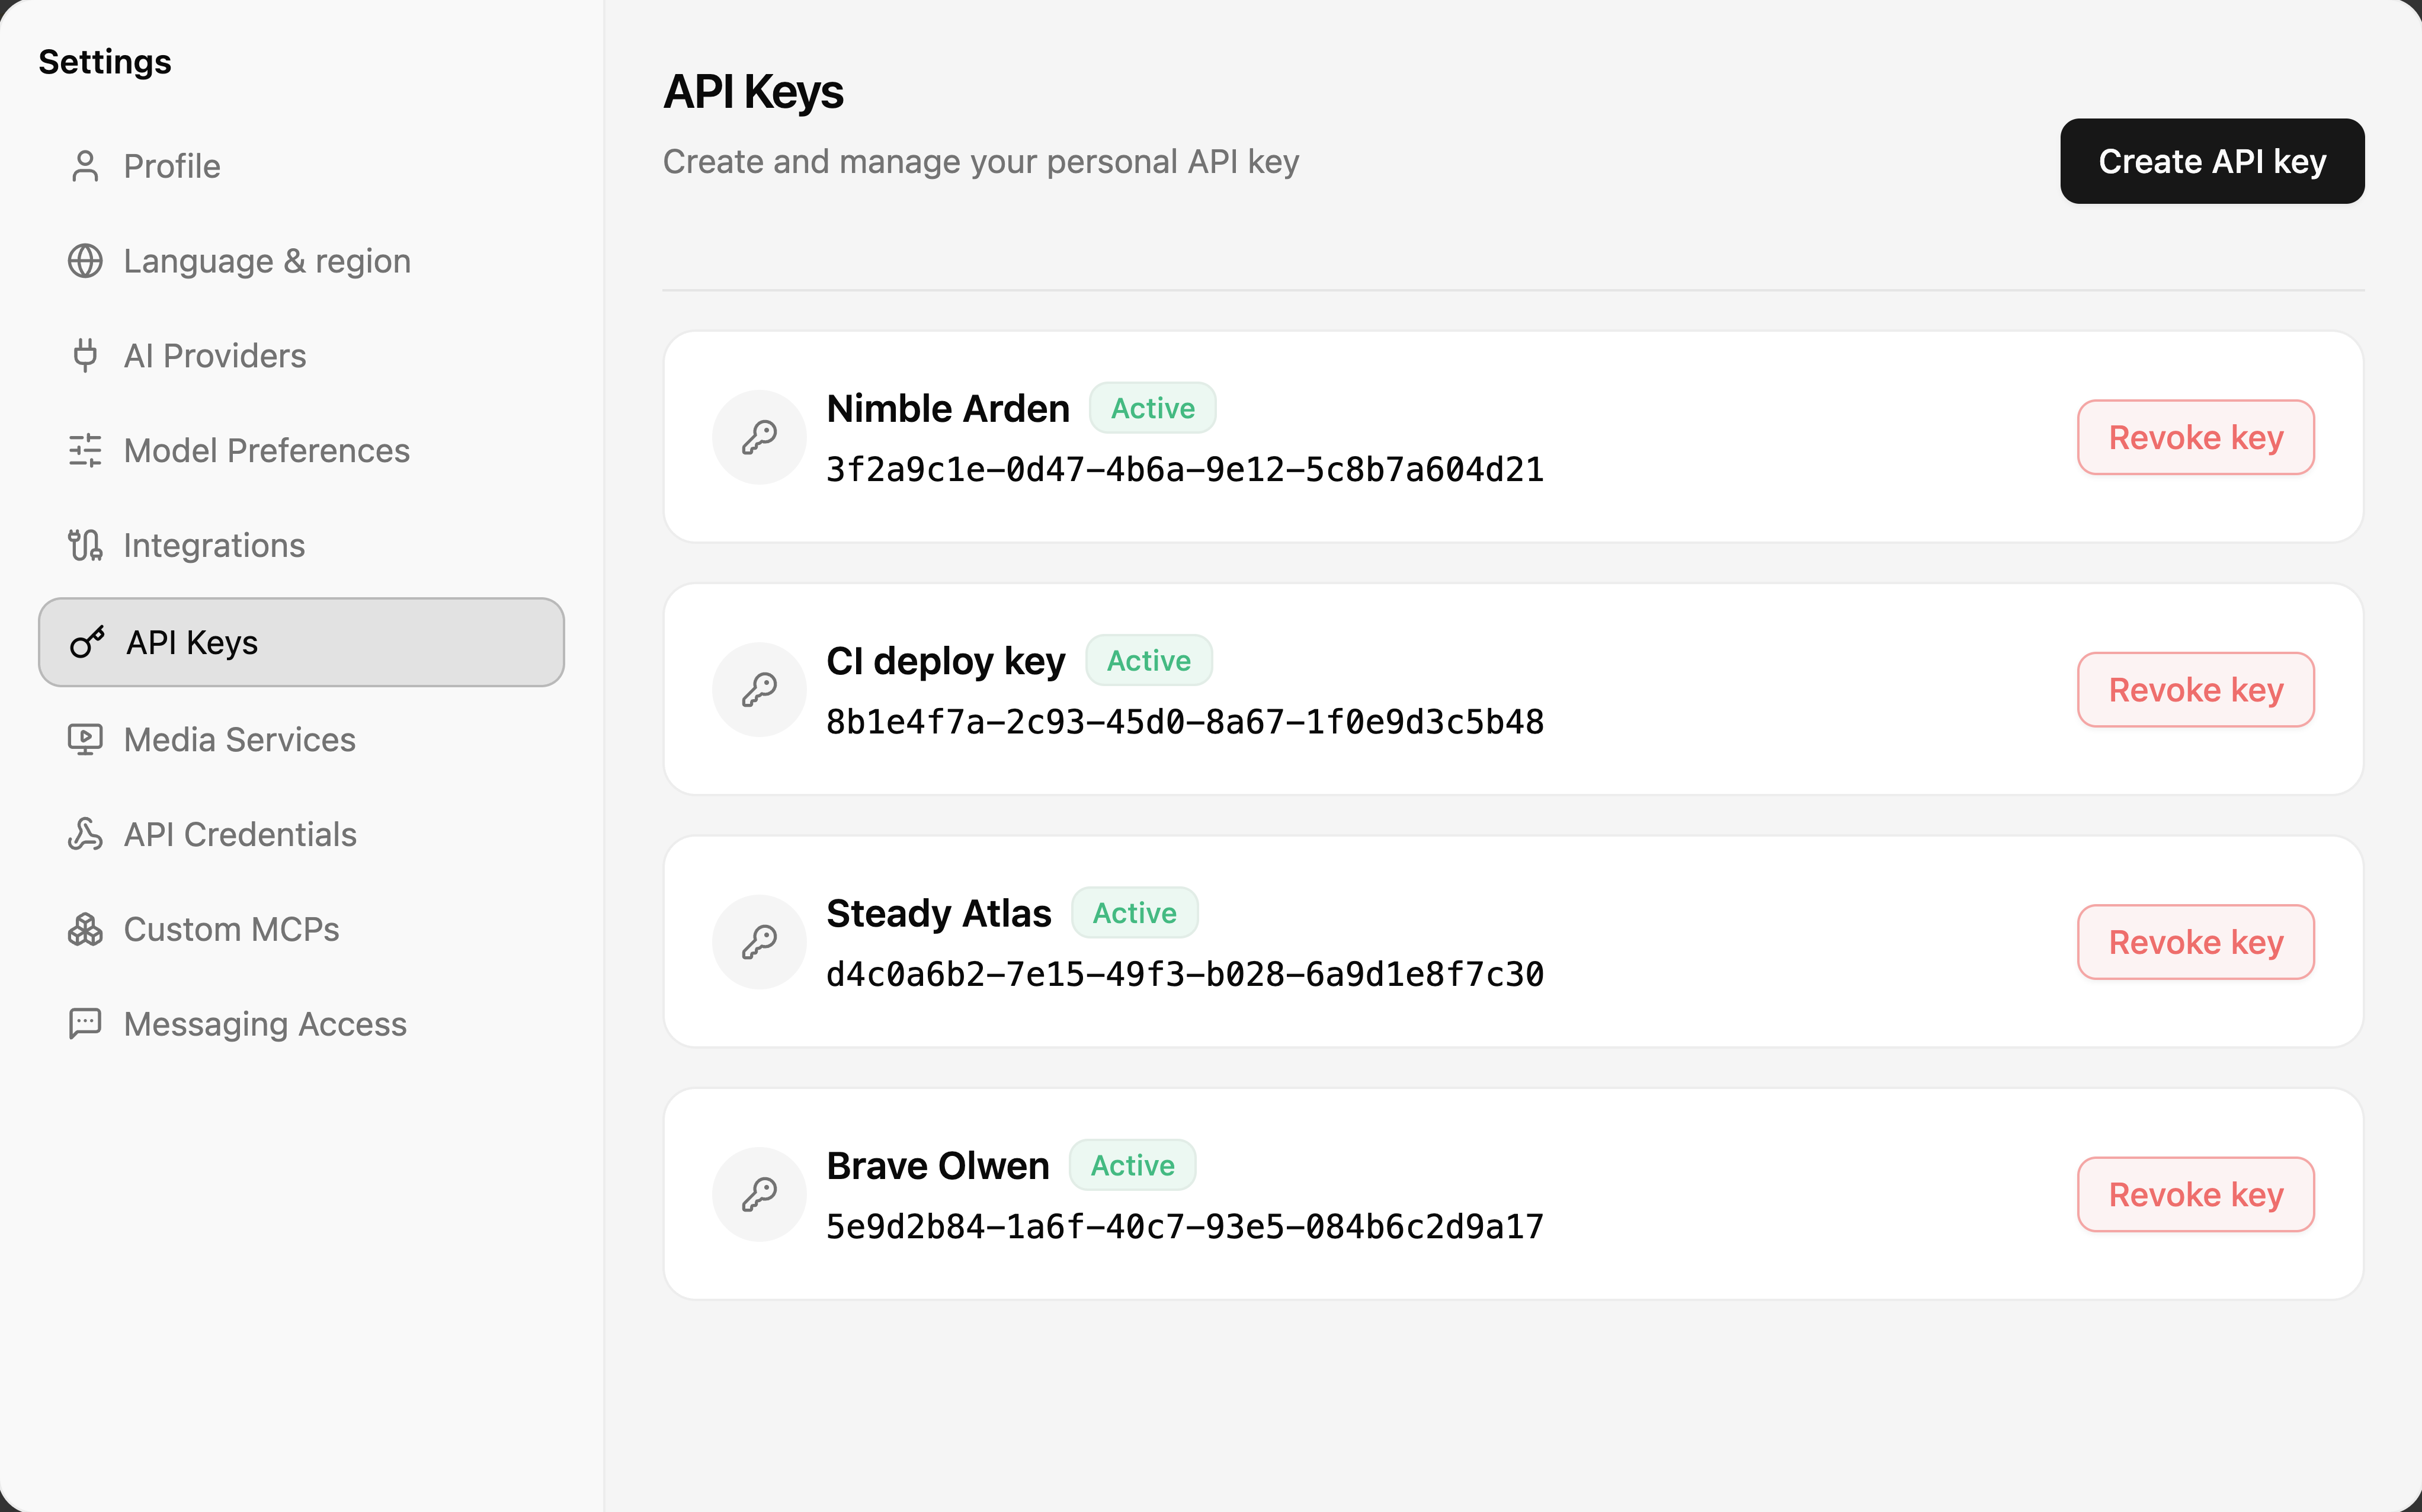
On the API Keys page:
- Title: "API Keys"
- Subtitle: "Create and manage your personal API key"
- Create API key button to generate new keys
Each key displays:
- Key name (e.g., "Quiet Echo")
- Active status badge
- Key ID
- Client ID (UUID format)
- Revoke key button
API keys are shown only once when created. Store them securely. Use the Revoke button to deactivate keys you no longer need.
Widget Designer
This collapsible section lets you create and customize an embeddable Chat Widget for your project. The widget allows visitors on your website to interact with your project's AI agent in real time.
- Icon: Chat bubble icon
- Description: "Embed a chat widget on your site"
Agent Selection
Choose which agent powers the widget. Use the searchable dropdown to browse your agent library. The selected agent's avatar is used as the widget's default avatar.
Display Settings
- Display Name — the name shown in the widget header (default: "Customer Support")
- Avatar URL — custom avatar image URL (falls back to the agent's icon)
- Welcome Message — greeting shown when a visitor opens the widget
- Suggested Prompts — up to 3 starter prompts, one per line
Design Presets
Choose from pre-built themes to quickly style your widget:
| Preset | Theme | Description |
|---|---|---|
| CloudStation Warm | Light | Orange primary, warm cream surface |
| Minimal Light | Light | Monochrome, clean look |
| Midnight | Dark | Purple primary, dark gray surface |
| Blue SaaS | Dark | Blue primary, dark background |
| Luxury Black | Dark | Gold primary, pure black surface |
Selecting a preset applies its colors automatically. You can further customize individual colors after applying a preset.
Color Customization
Fine-tune the widget appearance with these color fields:
- Primary Color — main action color (buttons, links)
- Accent Color — secondary highlight color
- Surface Color — background color of the widget
- Text Color — primary text color
- Muted Color — secondary/subtle text color
The settings drawer shows a live preview of the widget as you adjust colors and settings.
Position and Branding
- Theme — light or dark mode
- Position — left or right side of the screen
- Launcher Label — text on the trigger button (default: "Ask [display name]")
- Branding — toggle the "Built on CloudStation" footer on or off
The widget logo automatically switches between dark and light variants based on the surface color brightness and theme setting.
Rate Limiting
Protect your project from abuse:
| Setting | Default | Description |
|---|---|---|
| Daily message limit | 1,000 | Max messages per day across all visitors |
| Per-visitor daily limit | 10 | Max messages per visitor per day |
| Rate limit per minute | 5 | Throttle burst traffic |
| Message length limit | 2,000 | Max characters per message |
Allowed Domains
Control which websites can load your widget. Enter one origin per line, or use * to allow all domains.
Embed Snippet
After saving, copy the generated <script> tag from the settings drawer. It includes all your customization as data-* attributes. Paste it into your website's HTML to deploy the widget. Your Widget ID is the data-widget-id value inside this snippet.
The Enabled and Require login toggles are not part of the Widget Designer — they live in the Website Chat Widget section above, together with Allowed websites. Check all three before going live on a public site.
The embed snippet includes color, theme, position, and branding settings as data attributes, so the widget renders correctly before fetching remote config.
Danger Zone
At the bottom of the settings drawer is the Danger Zone section with a red-bordered card.
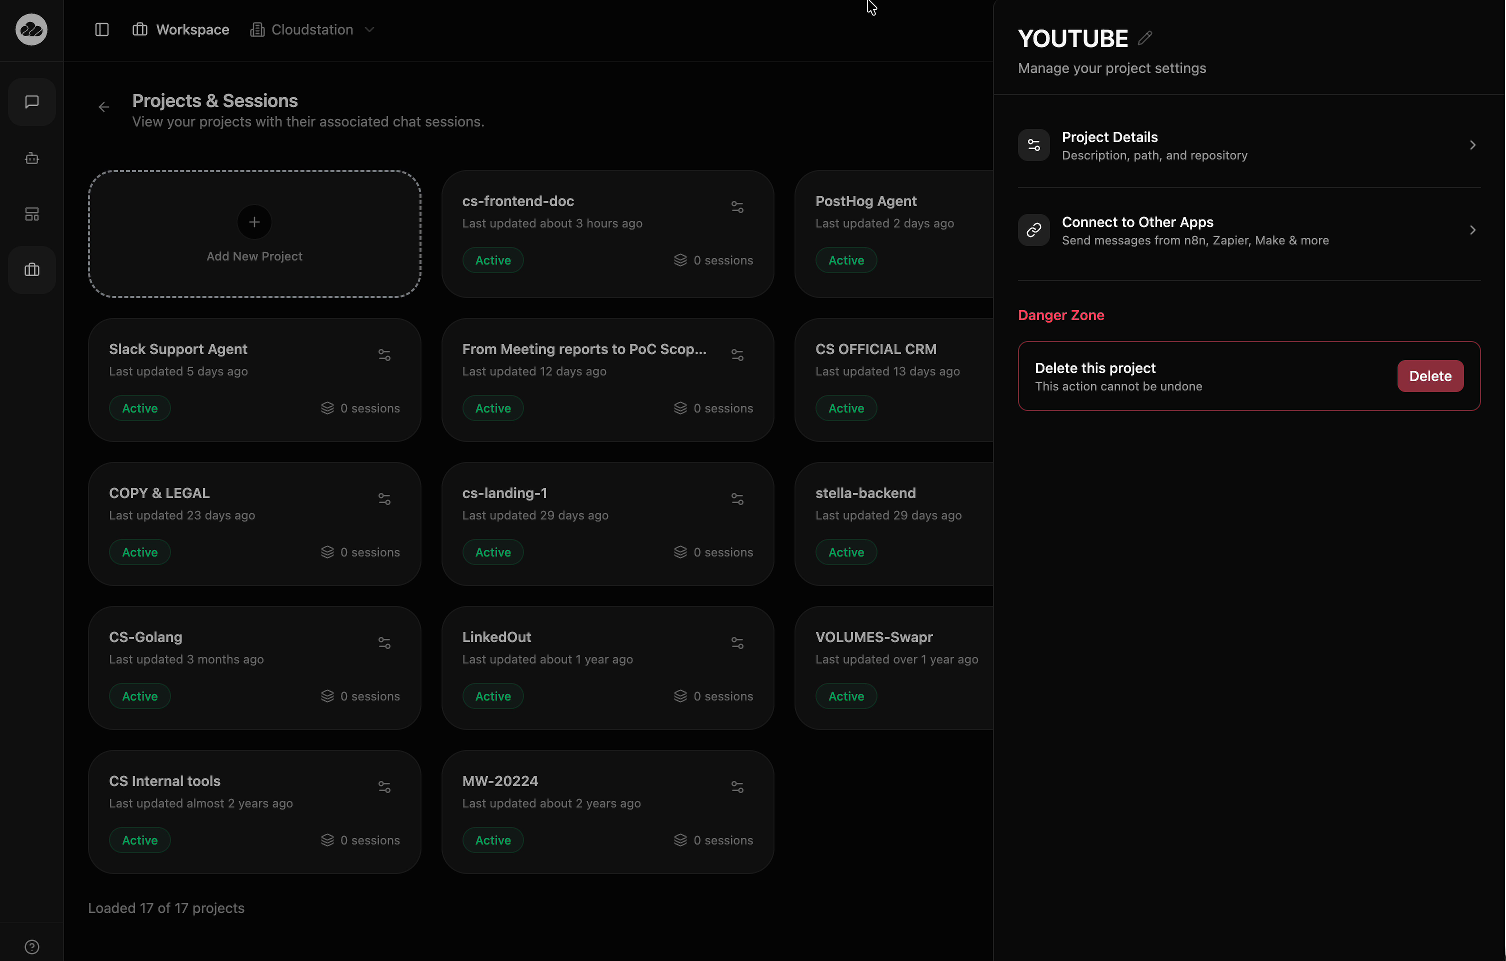
- Title: "Delete this project"
- Warning: "This action cannot be undone"
- Delete button (red)
Deleting a project removes all sessions, chat history, and associated data. This cannot be undone. You can also delete a project from the dropdown menu on the project card.
Permissions
Access to project settings depends on your role:
- Admin: Full access to all settings
- Member: Can view settings but cannot modify them
Learn more about roles in Team Management.