

Admin Setup Guide & Tour
The docked seven-step checklist that gets a new workspace running — and the guided tour that shows you the team page
The first time you open a team workspace as its owner or an admin, a small panel docks in the bottom-right corner: the setup guide. It is a seven-step checklist for getting the workspace genuinely ready — people in, sign-in sorted, credentials shared, connections healthy.
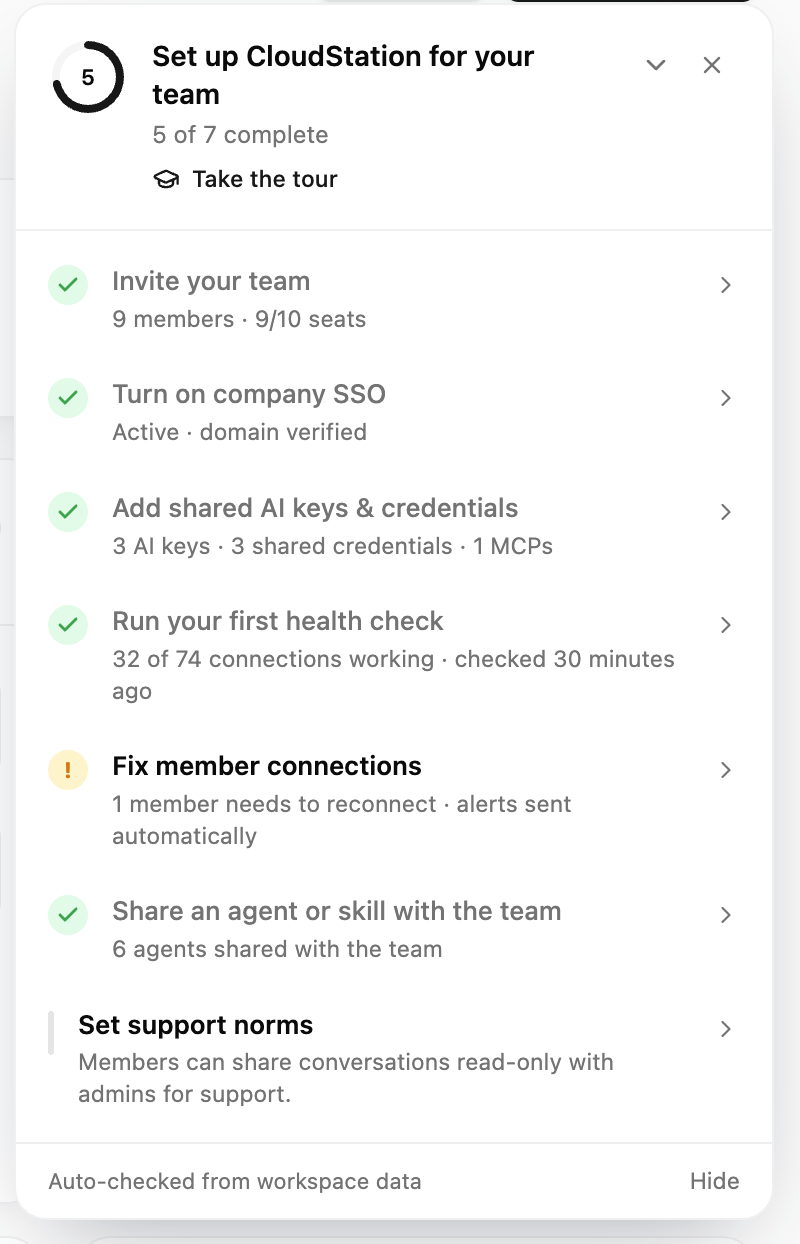
The header reads "Set up Contoso for your team" — your workspace name — with a progress ring beside it and the count underneath, "3 of 7 complete". Only steps that are fully done count toward the ring; the denominator is always 7.
Who sees it
The panel belongs to the team overview page and appears only for the team owner and team admins, and only in a real team workspace. Your personal workspace never shows it, and members never see it at all — they get the member welcome instead.
Nothing is ticked off by clicking
Every status is read from live workspace data each time the page loads — the footer says so: Auto-checked from workspace data. There is no "next" button that marks a step complete.
Because the statuses are derived, they can also regress. If your SSO domain verification lapses, or a member's connection breaks, the step that was green takes its checkmark back. The panel is a standing health surface, not a one-time wizard you finish and forget.
Four states are used:
| Mark | State | Meaning |
|---|---|---|
| Green check | Done | Nothing to do on this step |
| Amber ! | Needs attention | Set up, but something is wrong right now |
| Half-drawn ring | Partly done | Started, not finished |
| Empty circle | To do | Not started |
The seven steps
1. Invite your team
Everyone who signs in with company SSO joins automatically. Invite anyone else by email.
The data line counts your roster and seats — "1 member · 3/25 seats" or "14 members · 14/25 seats" (without seat data, just the member count). The step is done as soon as the workspace has more than one member.
Invite people opens the team details drawer on the Members tab.
2. Turn on company SSO
Company SSO lets your team sign in with their work account — no extra passwords, and new people join automatically.
This step mirrors the state of your SSO connection:
| Data line | State | What it means |
|---|---|---|
| Not set up | To do | No SSO connection exists yet |
| Active · domain verified | Done | Members sign in with their work account and join automatically |
| Domain verified — sign-in not enabled yet | Partly done | The domain is yours; sign-in is a separate switch you still need to turn on |
| Enabled — domain verification pending | Needs attention | Sign-in works, but domain ownership isn't confirmed yet |
| Enabled — domain verification failed | Needs attention | The DNS check didn't succeed — finish it in SSO settings |
| Turned off | To do | The connection exists but SSO sign-in is switched off |
Open SSO settings opens the Single Sign-On panel, where the whole flow lives — see Enterprise SSO setup.
3. Add shared AI keys & credentials
Shared credentials let agents reach company systems without every member connecting their own account.
The data line counts all three kinds at once — "2 AI keys · 3 shared credentials · 1 MCPs". The step turns green once at least one AI key is shared; shared credentials and MCP servers move it to partly done but never gate it, so the ring can always reach 7 of 7.
Add credentials opens the shared credentials panel.
4. Run your first health check
Health checks run on demand and after credential changes, and tell you which shared keys and member connections still work.
The data line reports the last result — "12 of 14 connections working · checked 20 minutes ago" — or "14 connections · never checked" if nothing has been tested yet, or "No connections to check yet" on a fresh workspace. The step is done once anything has ever been checked.
Test all runs the check straight from the panel; the button spins while it works. It is the same action as Test everything on the Workspace health card — see Team overview & health.
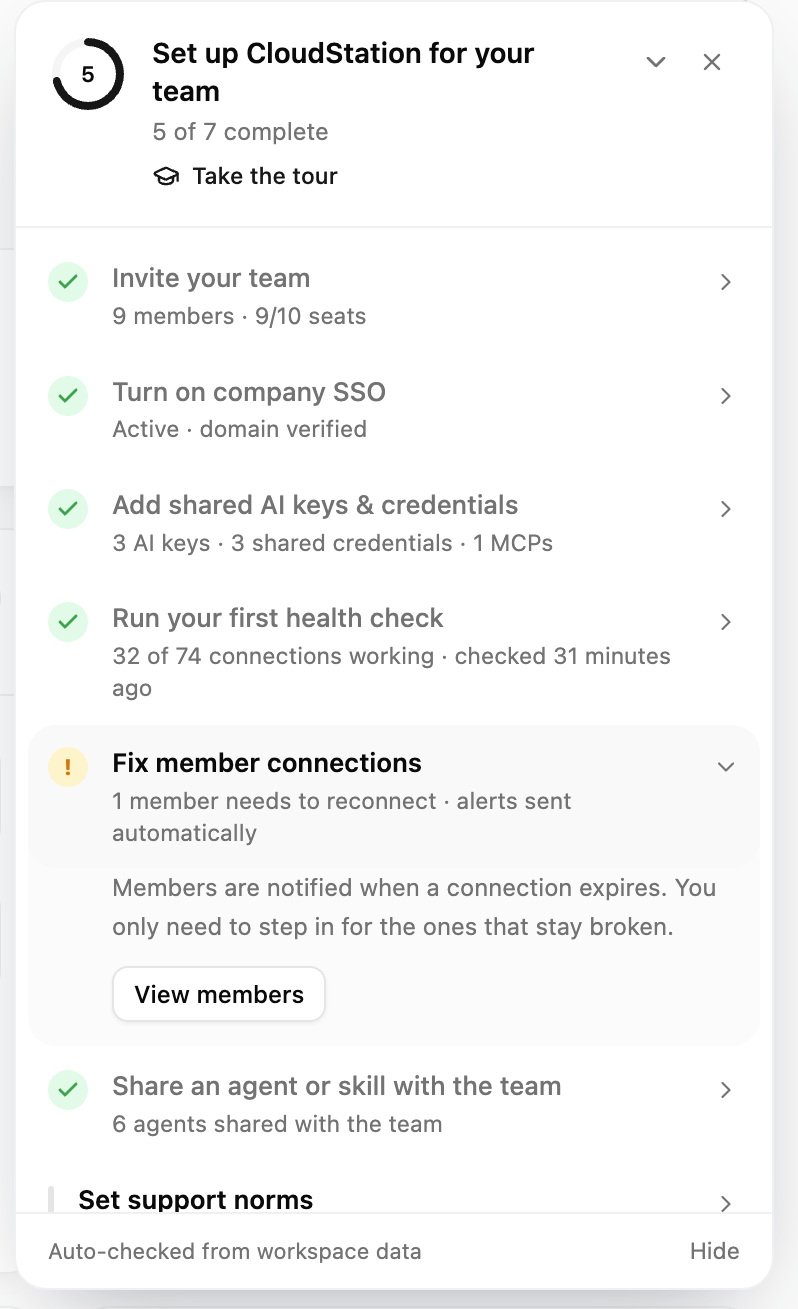
5. Fix member connections
Members are notified when a connection expires. You only need to step in for the ones that stay broken.
The data line is the honest count: "Every member connection is working", "1 member needs to reconnect · alerts sent automatically", or "6 members need to reconnect · alerts sent automatically". When the health data isn't available yet it reads "No connection data yet".
View members opens the Members drawer already filtered to Reconnect, so you see exactly the people concerned. They have already been alerted — see Notifications & connection alerts.
6. Share an agent or skill with the team
Pick an agent that already works for you. Sharing validates credentials first and warns about anything a member is missing.
Normally this counts what you've shared — "No agents shared with the team yet", "1 agent shared with the team", "4 agents shared with the team" — and turns green at one.
Share an agent takes you to the Agents page.
7. Set support norms
Members can share conversations with admins read-only — no screenshots, no external chat groups.
Its line is a standing reminder: "Members can share conversations read-only with admins for support." Learn more opens this documentation site.
Steps you tick yourself
Two steps can't be read from data. Set support norms is always one of them: agreeing how people ask for help is a conversation, not a setting. And if the shared-agent count can't be fetched, step 6 falls back to the same mode and reads "Share one agent, then mark this done".
Manual steps carry a Mark done toggle (Mark not done to undo). It is your assertion, not the workspace's — see below.
Collapse, hide, close
The chevron in the header collapses the panel to a small pill in the corner: a ring, the words Setup guide, and · 3/7. Click the pill to bring it back. The Hide link in the footer does the same thing.
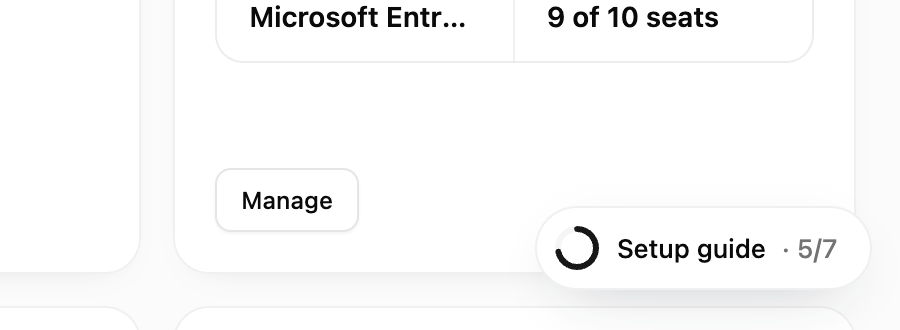
The ✕ closes the guide for good on that workspace. If you only want it out of the way for now, collapse it instead.
What is remembered
Whether the panel is collapsed, closed, or has a manual step ticked is stored per admin, per workspace, in your own browser. Two admins of the same workspace hide the panel on their own schedule, and a manual check is one person's assertion rather than a fact about the team. Switching workspaces switches the record with it. Everything else — all seven statuses and their data lines — is recomputed from live data every time.
Take the tour
The Take the tour link in the panel header starts a short guided tour of the team page. It also plays by itself the first time an admin opens a team workspace, once per admin per team — even if you skip it, it won't reappear on its own.
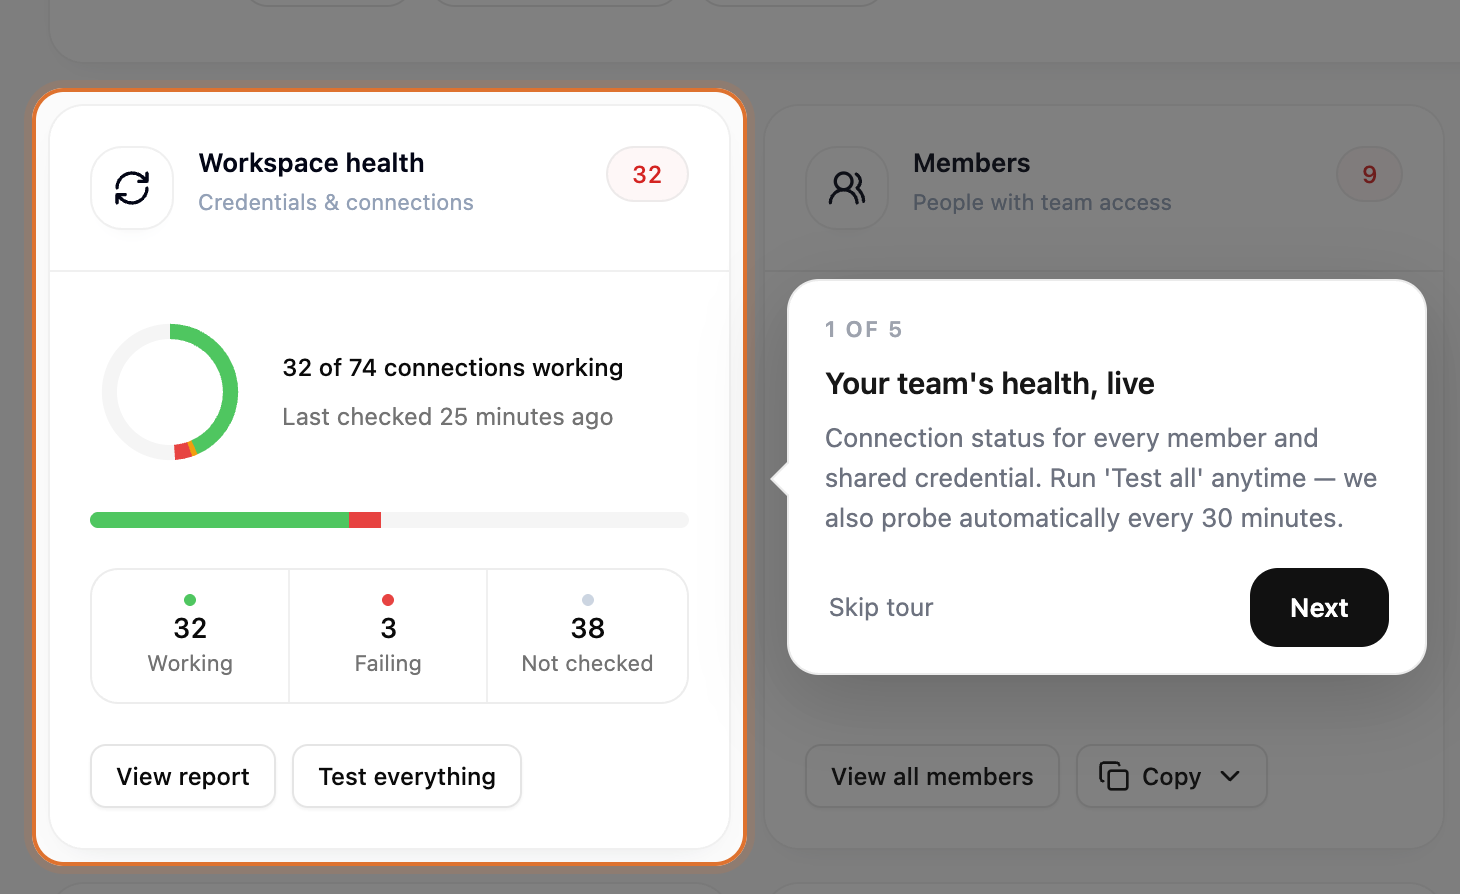
Five stops, in order:
| # | Stop | What it says |
|---|---|---|
| 1 | Your team's health, live | Connection status for every member and shared credential. Run 'Test all' anytime — we also probe automatically every 30 minutes. |
| 2 | We flag exactly who needs help | These rows show who must reconnect or hasn't set up their tools. Affected members are notified automatically with a one-click fix. |
| 3 | One login for everyone | Manage company SSO here — domain verification, access rules, and the audit trail. |
| 4 | Bring the rest of the team in | Invite by email — you'll see who registered and who hasn't. |
| 5 | Everything that breaks lands here | Alerts with one-click fixes, for you and every member. No silent failures. |
If something a stop points at isn't on the page, the tour skips that stop rather than pointing at nothing.
Moving through it:
- Next advances (the last step reads Done); clicking the highlighted area does the same.
- Skip tour ends it immediately.
- → and ← step forward and back; Esc closes the tour.
- Clicking anywhere outside the highlight pauses rather than quits — a Tour paused pill appears with Resume and End tour.
Whenever you want it again, open the setup guide and click Take the tour; replay ignores the once-only rule.
While the tour is on stage the setup guide hides itself — it docks over the SSO card the tour needs to point at. It comes back as soon as the tour ends.